Snickerdoodle Protein Pudding & Naked Nutrition Review

Well hey there!

Today I have a deeeelicious recipe, tips for picking the right protein powder for YOU, plus an exciting product review and I can't wait to dish all about it so lets gooooo!

I want to start by saying that for those of you who aren't familiar with my product reviews I am REALLY picky about products I try. For reals a lot of people and companies reach out to me about trying their products and I won't even try a product that I feel is not inline with the integrity of the paleo ballerina and the standard I've set here for all of you. I take this responsibility seriously and if you see something on here please know that I have personally used it. On top of that I have a policy of trying any product before I will recommend it. Just because something SHOULD be great doesn't always mean that it is. #sorrynotsorry

It's also important to note that there are a lot of random things I can't eat or drink because I'm nursing. That means still no caffeine for me, no eggs (they make my babes tummy hurt), and there are other random things like mint etc etc that I have to avoid these days.

Okay onto the actual content of today's post!

Naked Nutrition

Today I want to tell you a little bit about this awesome little company called Naked Nutrition. The thing in general that I like most about them is that they make NAKED protein powders and super clean supplements. Now that does mean they're all perfect BUT they have some really amazing options if you're looking to drink some clean ass dranks.

NAKED GOAT WHEY

As far as the products I tried - I had their naked goat whey as those of you who follow me on Instagram have probably seen, and I've been using it A LOT for smoothies etc.

Literally the only ingredient is goat whey. I mean how awesome is that? It's just about impossible to find products that are that pure these days and Naked Nutrition impresses the hell out of me for making them. The nice thing about a naked protein powders like the goat whey I tried is that its insanely versatile. You can create unlimited mixtures, flavors, and concoctions and you know EXACTLY what's going in it unlike other "natural flavors" in most protein drinks.

It really doesn't get much better than that for those of us who are CONSTANTLY combing through ingredients 24/7 aka me and probably every other clean/paleo/vegan eater out there who's trying to optimize health and not eat crap. And hey if you're trying to clear you skin - I'd recommend you get just a little bit anal about ingredients too. It's kind of important!

With that being said I know a lot of you just about had a shit fit that I was 'drinking dairy' - but I've been able to tolerate goats milk yogurt and cheese without breaking out for awhile. I try not to have it daily or anything, but my body does just fine!

You may not be there yet aand that's totally cool. Goats milk in general is easier to digest so whenever you do try to reintroduce dairy I suggest you start with goat!! But for now if you're not into Goat Whey here are other options I would explore that are 100% clean, some paleo, some vegan, and all clear skin friendly (depending on your body). Depending on your body different ones might work better for you. How do you know if it "works" for you? Check for bloating, breakouts, and gas. Here are some alternative options for you in order from best to worst in MY book:

1. Organic Brown Rice Protein

2.  Pea Protein

3. Egg White Protein

Another cool thing they have are "less naked" proteins meaning there are other things added to them, so they are not just the good ol protein. They also have naked peanut powder (if you're into peanuts) and peanut cacao powder. Essentially they have all of the things but in NAKED form so without additives. I mean that's pretty cool right!? Talk about versatile and offering something for EVERYONE!

There are sample packs also so you can see what works best.

As for the goat whey it doesn't have much flavor on it's own, but it certainly made my smoothies REALLY light delicious and fluffy which I love. Overall I was impressed, but I also want to try their Rice Protein because like I mentioned - I don't really love doing goat everyday.

And that's about all I have to say in regards to the goat whey. I've thoroughly enjoyed it and I'm just about at the end of my massive container. Oh one warning - the powder can get a little messy. It's pretty fluffy and kind of flies everywhere when you scoop it.  

WATERMELON BCAAs

IMG_8872.JPG

The other product I tried were their newer Watermelon BCAAs. Now I generally find BCAAs to taste gross in general. Like for real they work really well to help keep on lean muscle mass while speeding up recovery BUT I have never liked the taste.

Generally I had been drinking a Raw BCAA by Scivation and just mixing it with a smoothie or coconut water in an attempt to mask the taste because again - BCAAS TASTE GROSS YA'LL. But I decided to try out what Naked Nutrition had to offer because the idea of a yummy but clean BCAA sounded too good to be true!

In this case I agreed to these before reading the ingredients list because I was like I'm sure these are greeaattt! Well unfortunately there are two things about this particular BCAA that I'm not thrilled about: 1. There is sugar in it 2. There's no glutamine.

INSERT SAD FACE :(

Now I'm not gonna lie - I still drank and am drinking these BCAAs even with the sugar in there (it's a tiny amount btw only 2g) because I'm not sugar detoxing or anything and well, they do work really well for my muscles! They have a naked one as well so that's an easy solve if you're avoiding sugars! My husband has been drinking them as well and said it has helped SO MUCH with his muscle soreness and recovery! So while I wish they tasted better, I've come to terms with BCAAs just tasting gross. But the thing that REALLY does disappoint me about both the watermelon flavor AND the Naked one they have is that they sell glutamine separately and do not add it to their BCAAs.

Why do I care? Because L-Glutamine helps to heal and seal your gut lining if you have leaky gut ie it helps clear your skin. Glutamine is crucial for those of us with acne and I love that BCAAs typically provide a one stop shop for gut health and muscle recovery.

Alas, you'd have to buy them separately which I have done. I just prefer as few supplements as possible personally. I used to drink just a plain glutamine back in the day but once I discovered this BCAA hack I turned my back on it. #sorrynotsorry

Overall for ME I think I'll stick with my old brand even though it tastes like pure ass. At least there are no additives (which again Naked does offer as well) and I don't have to buy my glutamine separately.

WRAPPING UP

Overall I really am so impressed and happy to have been able to try out Naked Nutrition's products! I think they're a great transparent company doing things the right way and I'm very grateful that they wanted to send me some products to try! I would be glad to work with them more in the future!

NOW with alllll of that being said - let's get to the recipe!

fullsizeoutput_79d.jpeg
fullsizeoutput_787.jpeg

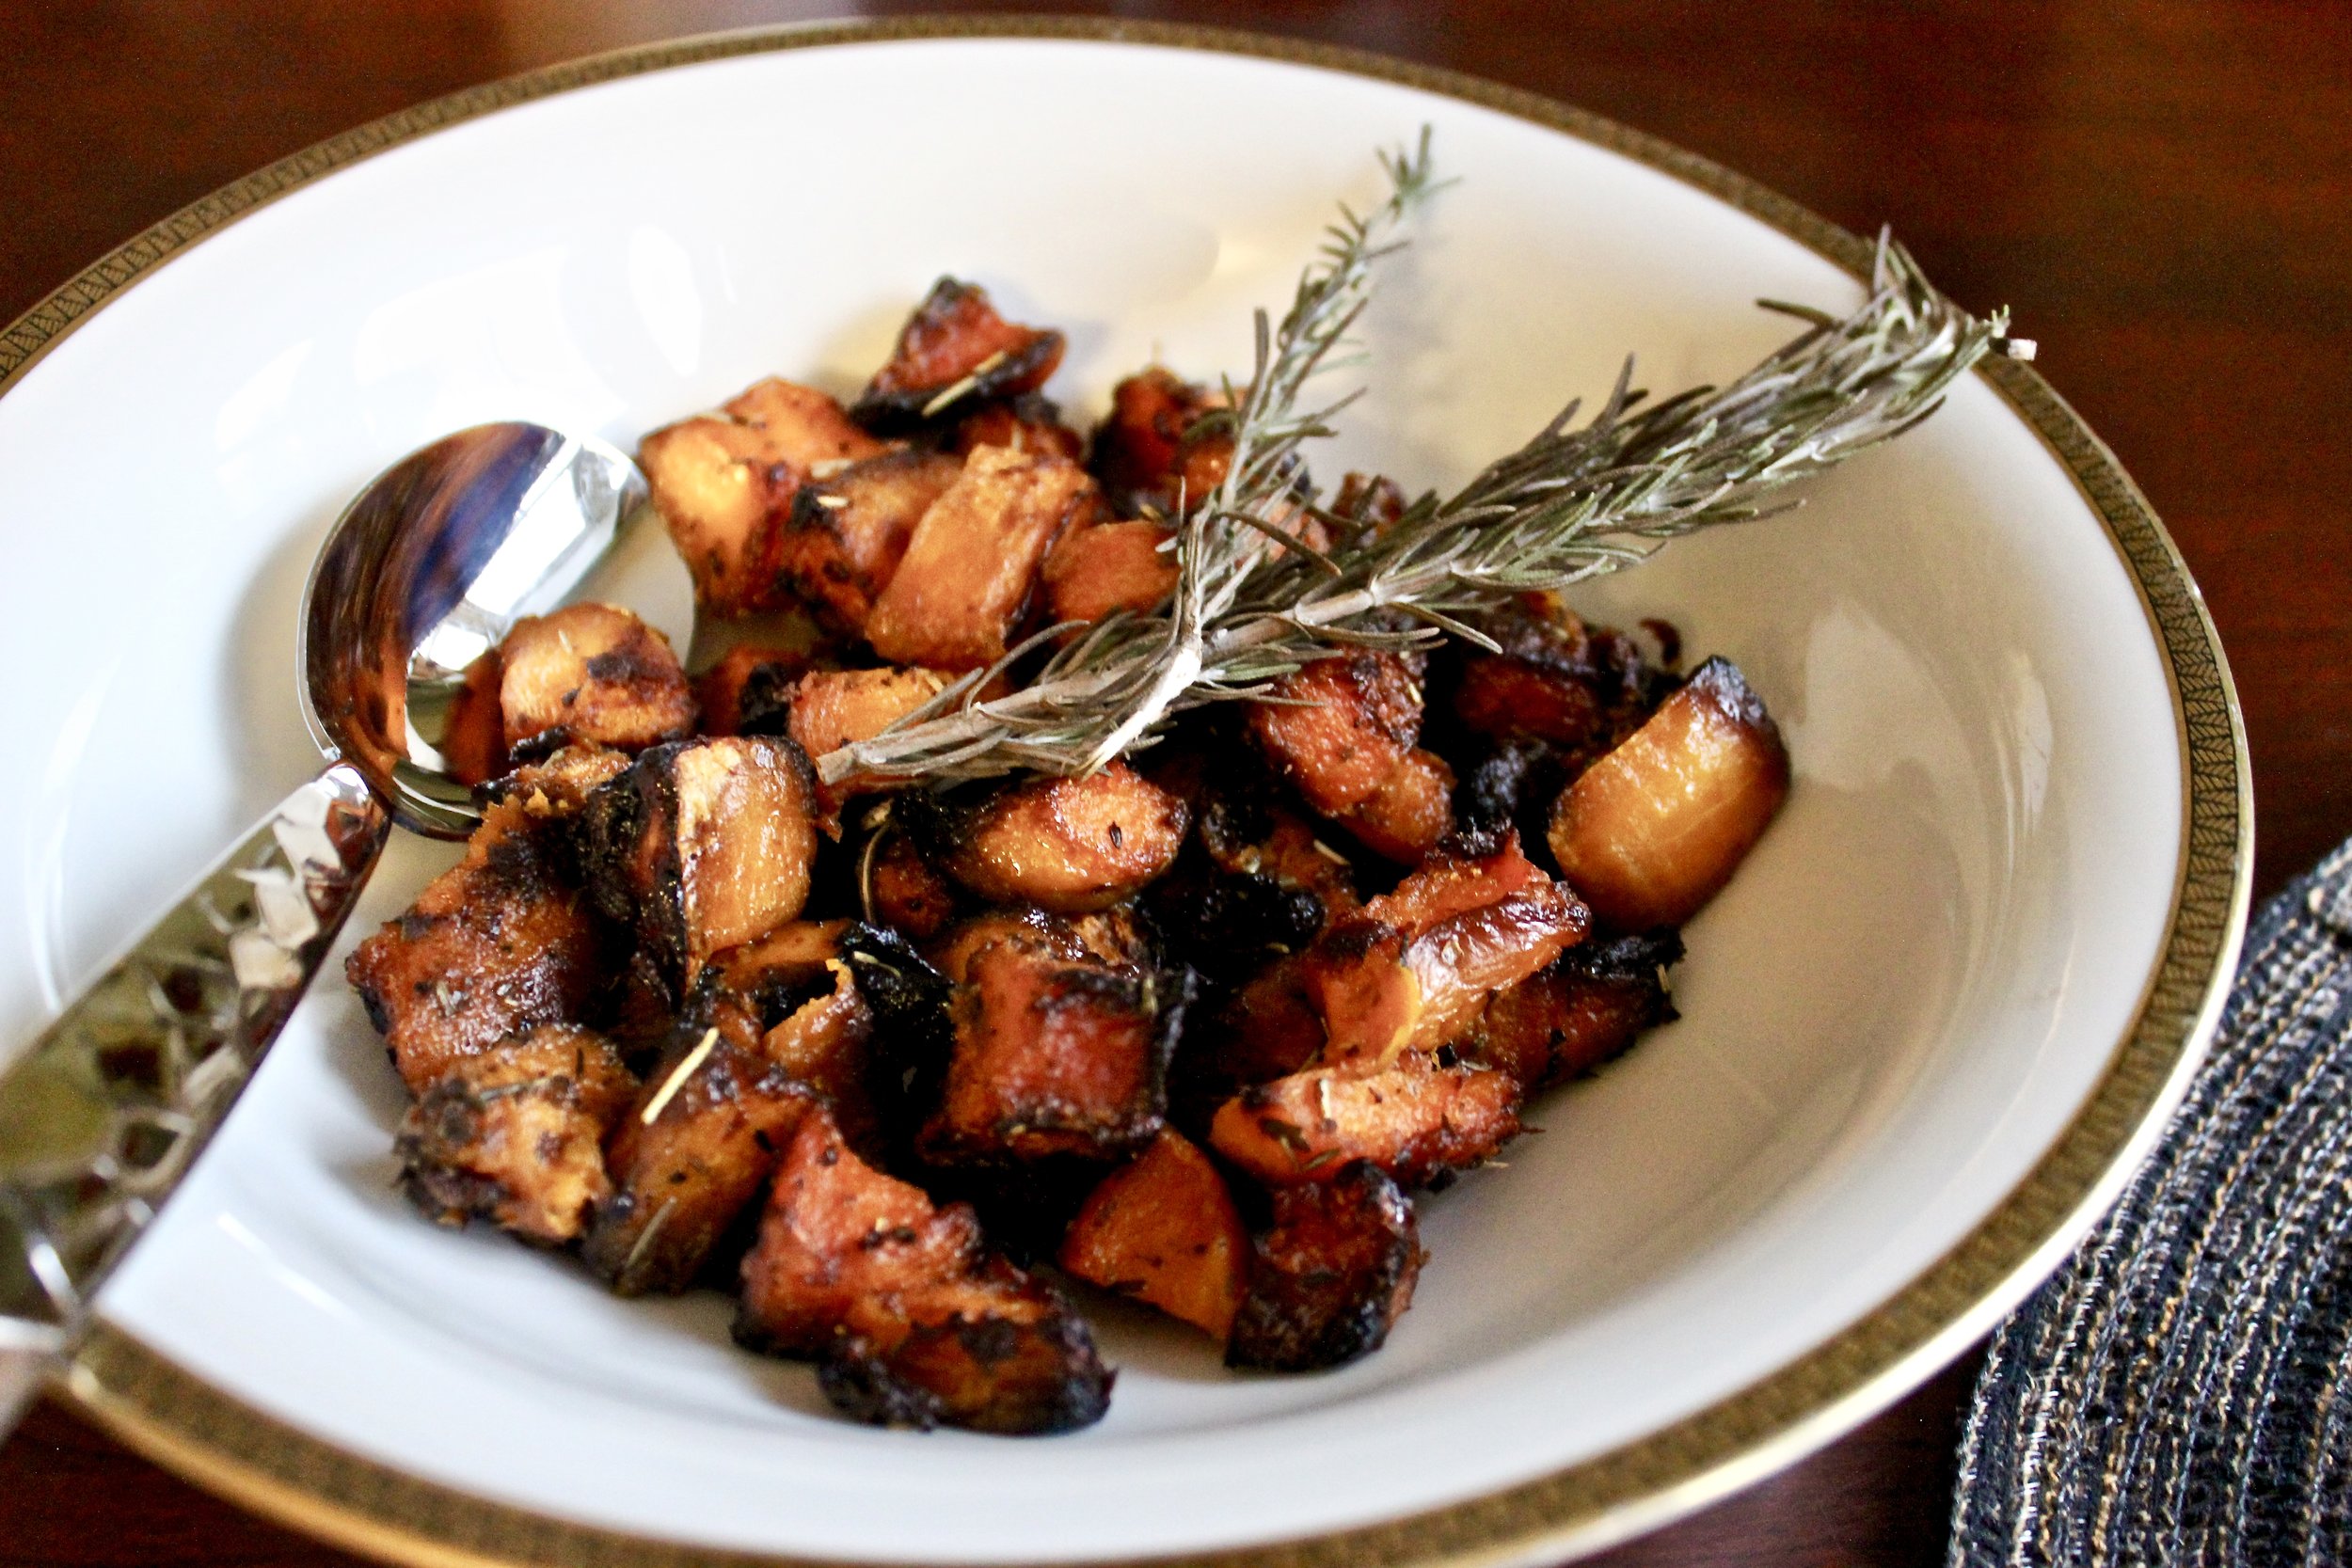
I have to admit - this delicious treat was out of this world! I didn't even expect it to come out as well as it did and I am very happy to be sharing it with you!

On top of it's great taste this little bowl of pudding packs a MEAN punch of protein and healthy fats! Can we say treats without the guilt? Not just guilt free but actually super nourishing!

Okay let's do it!


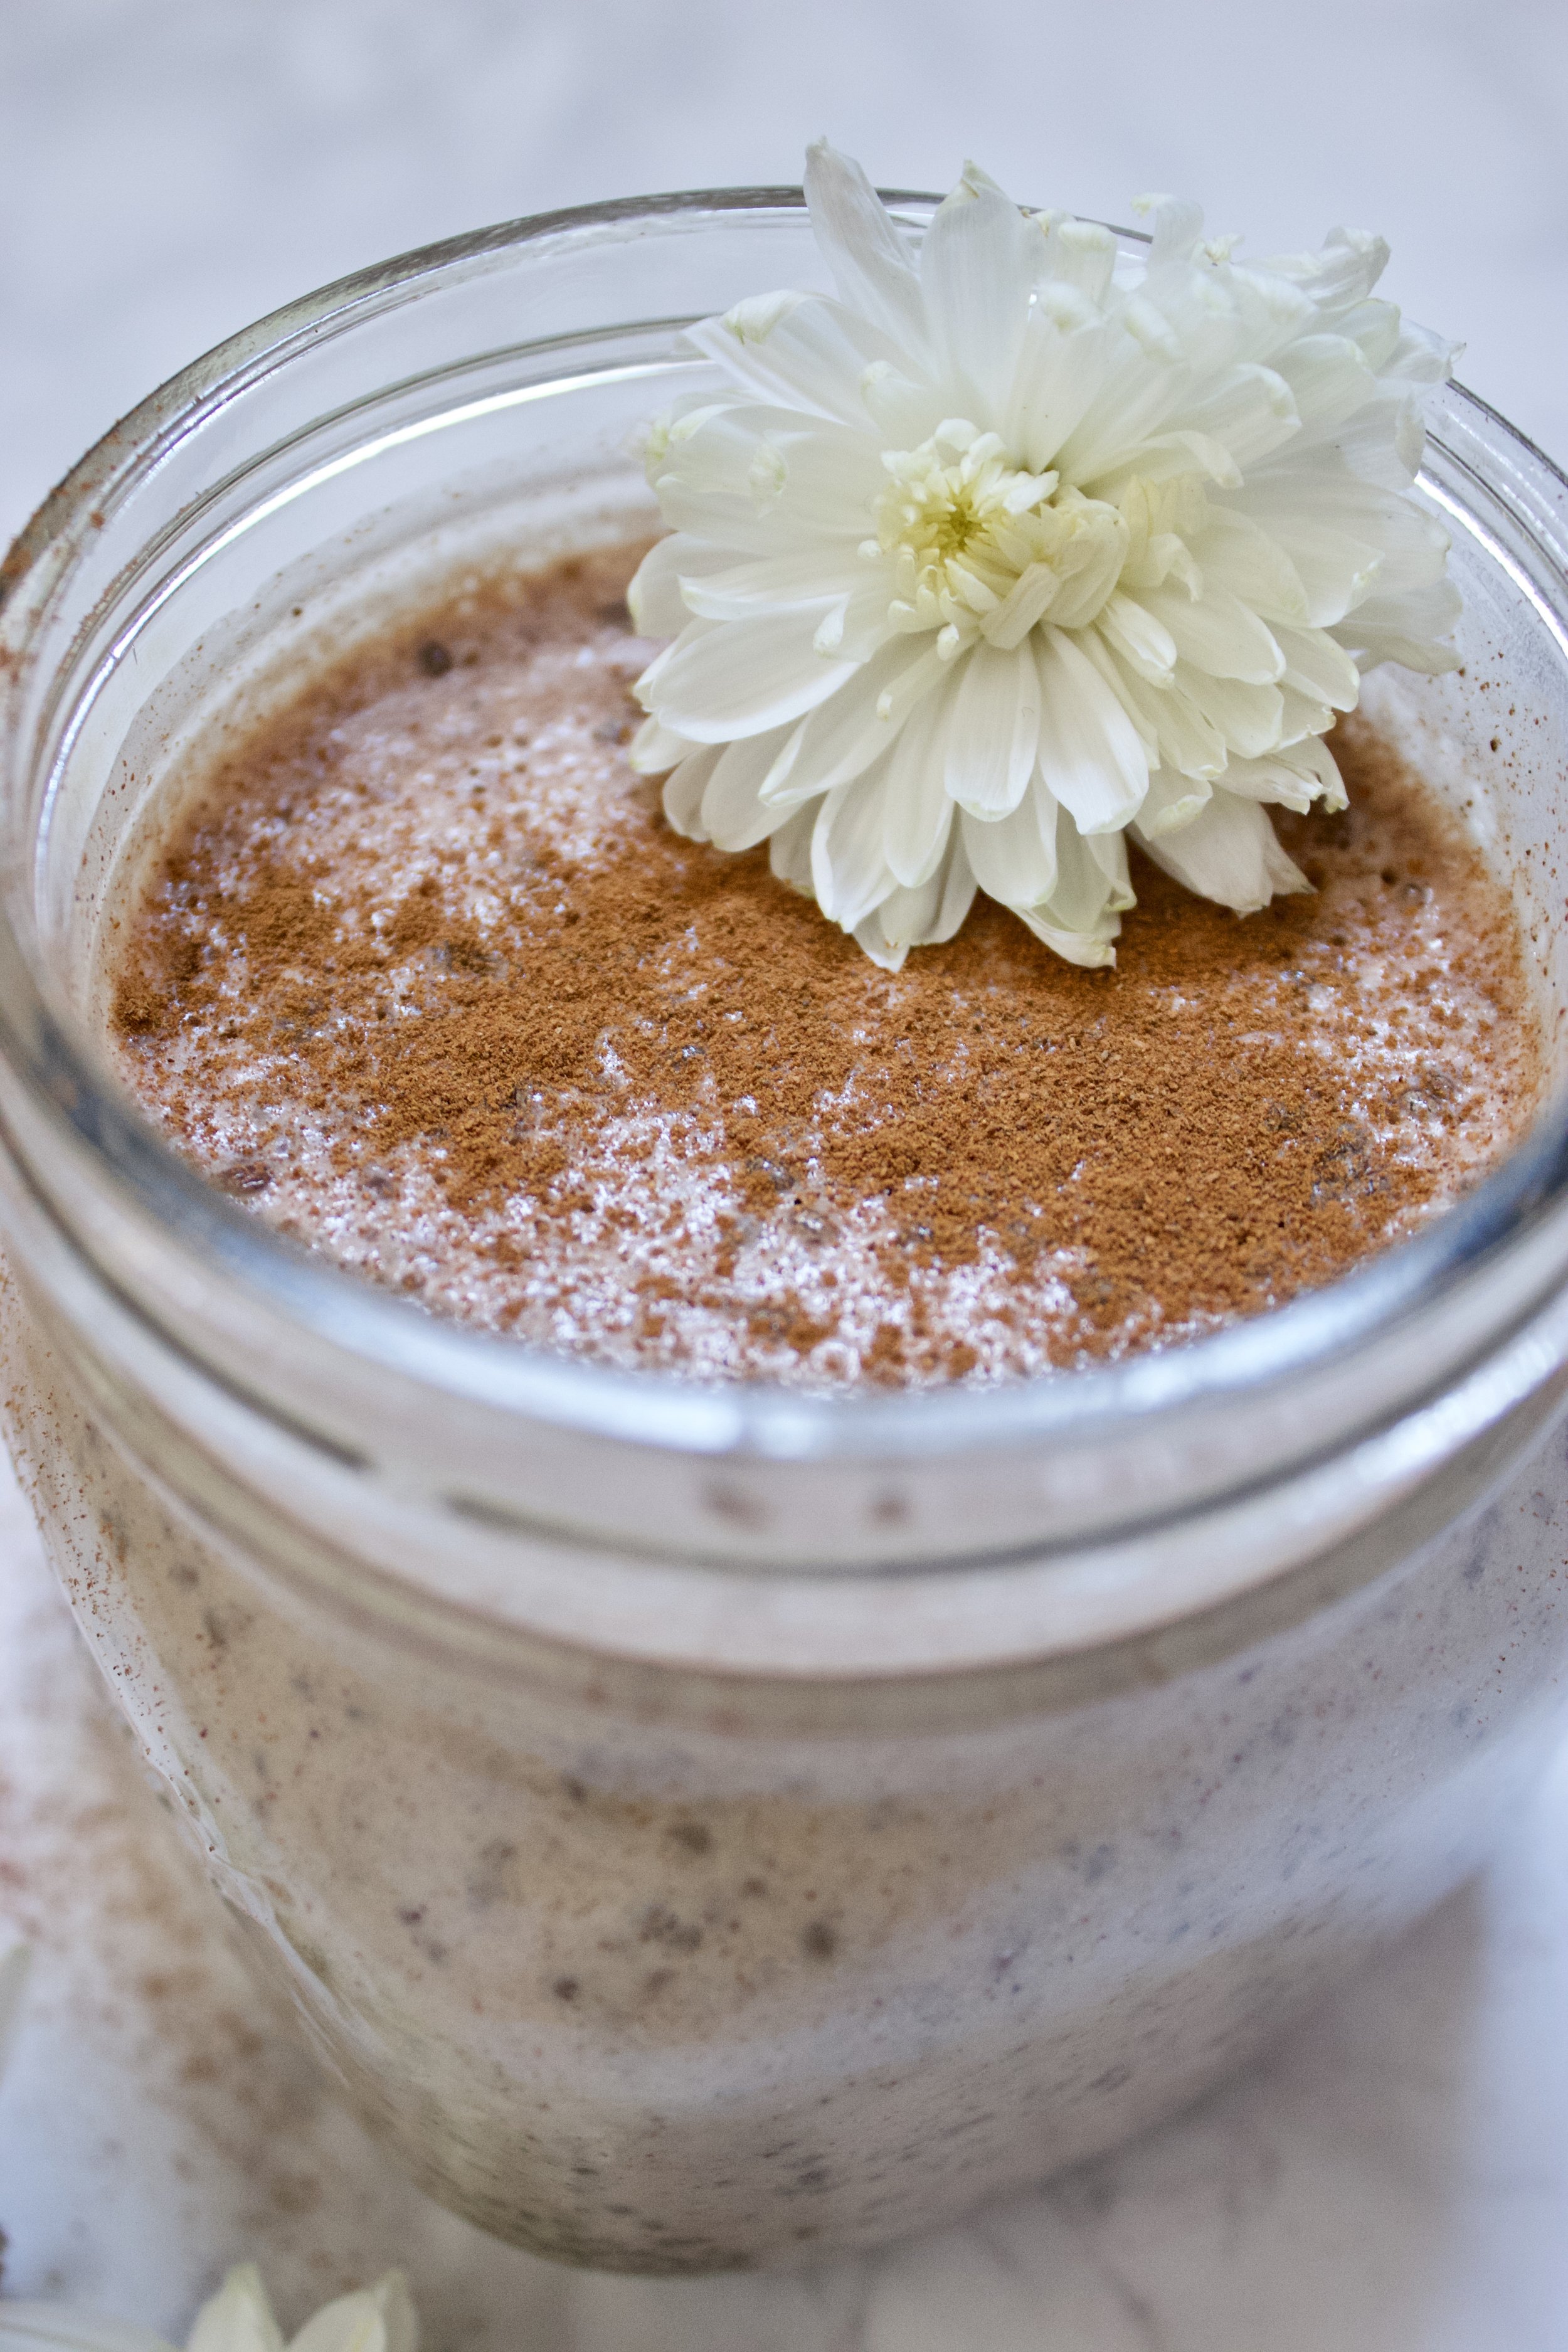
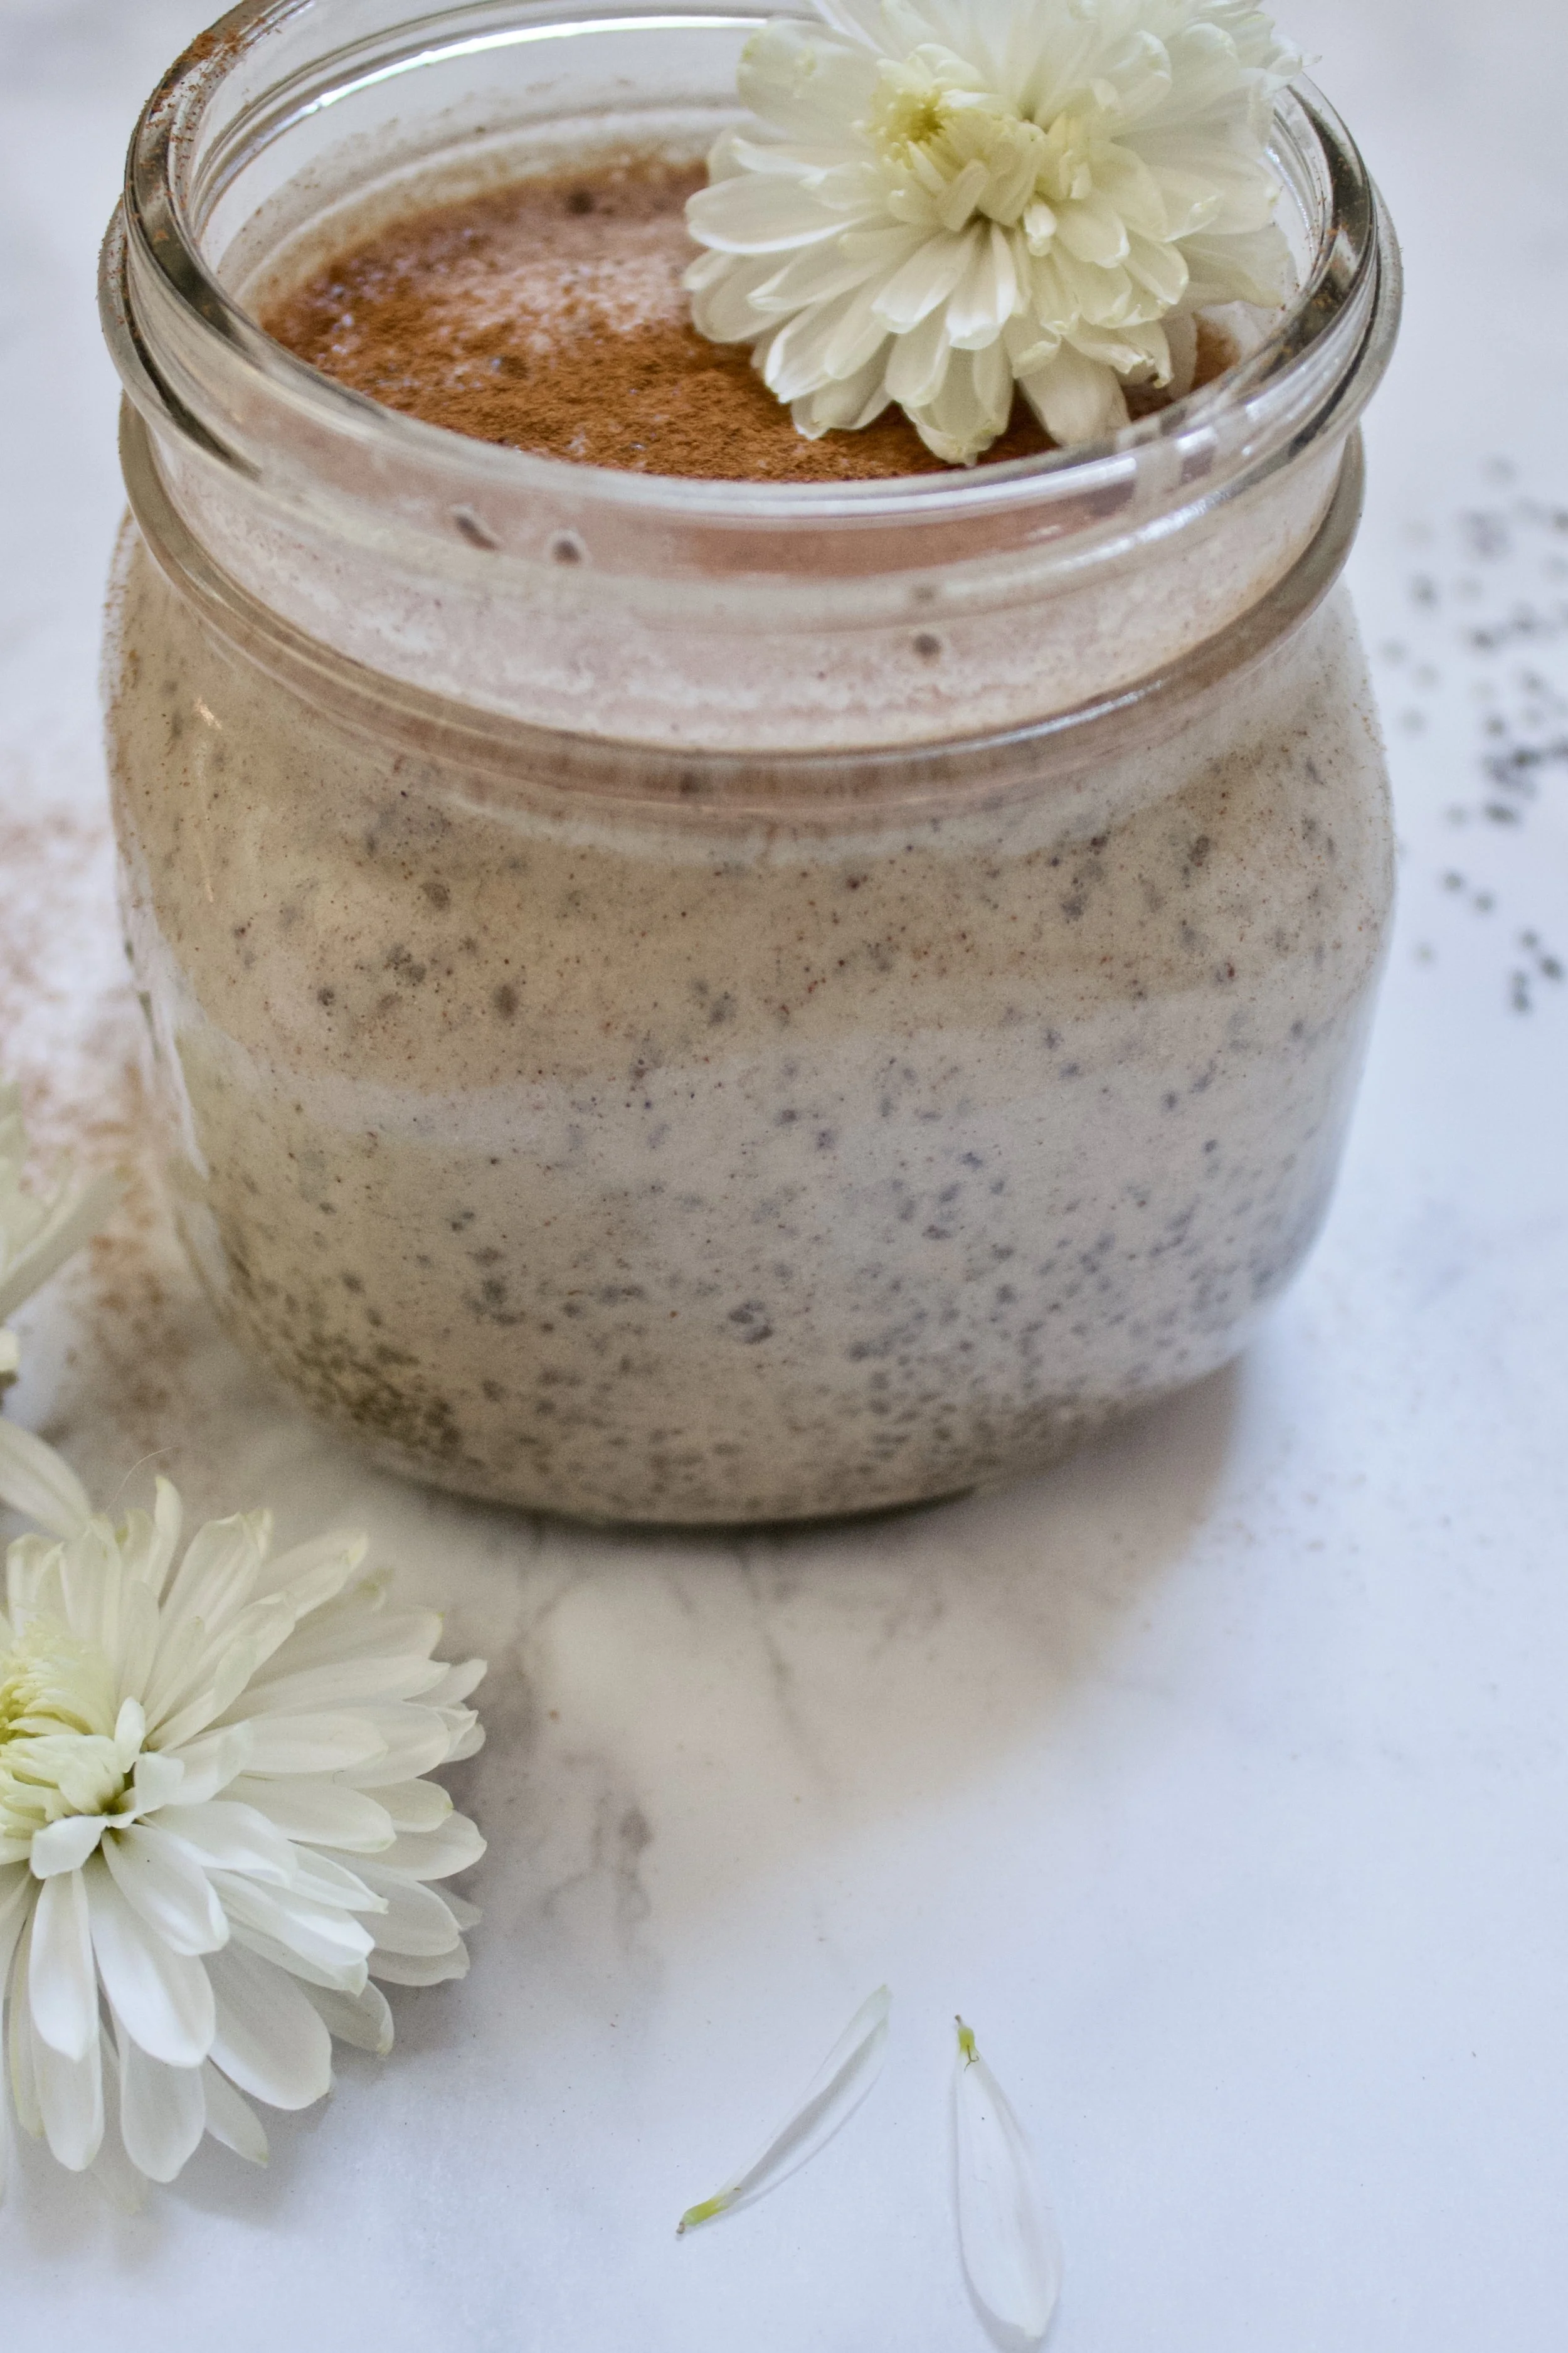
Snickerdoodle Chia Seed Protein Pudding

fullsizeoutput_778.jpeg

Serves 1 - 2

INGREDIENTS:

6 tbsp Chia Seeds

1 Ripe or Over Ripe Banana (use green tipped for 21DSD)

1/2 Can Full Fat Coconut Milk

1 tsp MCT Oil (optional)

2 Scoops Protein Powder (I used Naked Goat Whey)

2 Scoops Vital Proteins Collagen Peptides

1 tsp Cinnamon

1 tsp vanilla extract

Pinch of Himalayan Pink Salt

Optional: liquid stevia, honey, or maple syrup to taste (I think it's sweet enough without!)

INSTRUCTIONS:

Smooth pudding: place all ingredients into a high speed blender and blend. Pour mixture into glass mason jar and refrigerate for a minimum of 4 hours or overnight is best.

Chunky pudding: place all ingredients EXCEPT the chia seeds into a high speed blender and blend. Pour mixture into glass mason jar & add chia seeds. Stir until well combined - the better stirred the more even your pudding will be. Refrigerate for a minimum of 4 hours or overnight is best.

Remove from fridge, stir, garnish with cinnamon and enjoy!


Thanks so much for joining me today, I so appreciate each and everyone of you!

Also also alsoooo!!! Before I forget....

I recently relaunched Discovering You Podcast and I am suuuper duper excited about it! I'm so excited that I'm doing a giveaway of my favorite water bottle - HYDRO FLASK! I'm not affiliated with them at all but they're my fav! So to say thank you to my amazing listeners, readers, and followers I wanted to give ya'll a gift!

I'm so happy it's BACK and I'm BACK and it's really so different than it used to be and better now I think!

I hope you are excited about it being back too because I have some great topics for you! Go check it out over on iTunes, Stitcher, or Sound Cloud - Episode 16 may or my not be the episode where I announced the giveaway and told you how to enter also!!!

So go listen while you make some chia seed pudding and don't forget to ENTER the GIVEAWAY!

As always thanks for being here and if you make this pudding be sure to shoot me a message with your thoughts or tag me in a picture! I love sharing your creations!

Have an amazing weekend!


xoxo -.png
PS: READY FOR NATURALLY CLEAR SKIN & RENEWED CONFIDENCE?
Join hundreds of subscribers and get instant access to my resource library of ebooks, worksheets, and resources for acne sufferers & health seekers alike!

Paleo Orange Chicken & Broccoli

True Story: I was going to save this recipe for my secret and very much unfinished/pipe line dream book, but I just couldn't wait.

It's THAT good.

I always loved Chinese food and my fav was the sesame chicken or orange chicken made spicy! I mean between the breaded fried chicken like product (what kind of chicken is that anyway?) and the MSG & sugar laden sauce I was hooked. I mean it's sesame chicken! You can't deny it's delicious!

But regardless of it' taste, it's also super nasty unhealthy - so I ditched it to clear my skin just like many other former staples in my diet. I don't regret doing so one bit but sometimes you just want to chow down on some Chinese food! 

In comes this delicious recipe!

The first time I made this and fed it to my husband he was blown away by how delicious it was! I mean I don't want to over hype this or anything but I can confidently say that hubs and I really loved this meal! 

In this case I made it with broccoli but you could absolutely make it with other mixed veggies, caulirice, and or real rice! The first time I made this recipe I actually made it using the hodge podge frozen veggie bag from Trader Joes and some good ol caulirice. It was friggin delicious! Just follow the same directions as I listed below for the broccoli and you'll LOVE it!

I also just generally love those hodge podge veggies but that's another story!

I made this recipe with broccoli because not everyone has access to Trader Joes. So with that in mind - broccoli it is! But I personally prefer hodge podge... So yeah!

OMG looks delish right!? Well it is!

Good news of course is that this recipe is Whole 30 friendly, low carb, keto, AIP (without the red pepper flakes), competition prep friendly and all that jazz!

It is also a GREAT recipe to make as a weekly meal prep. You can easily pack it up into some glass containers and take it to go erry day of the week! Mmmmmmmhmmmm! Okay not I want to go make this again!

So here's the recipe for yah!


Paleo Orange Chicken & Veggies

Serves 2-4 people

Ingredients:

Chicken:

1.5 lbs organic boneless skinless chicken thighs cut into cubes

1tbsp + 1tbsp coconut oil (separate)

1tbsp + 1tbsp toasted sesame seed oil (separate)

1/4 cup coconut aminos

1/4 cup fresh squeezed orange juice

1tsp raw honey

1/2 tsp ground Ginger

1/2 tsp granulated Garlic

1/4 tsp Sea salt

1/4 tsp ground Turmeric

1/2 tsp Ground mustard

Veggie:

1 bag of organic broccoli or 2 bags Hodge Podge veggies from Trader Joe's 

2 tsp coconut oil

2 tsp sesame oil

2 tsp ume plum vinegar

2 tsp coconut aminos

1 tbs fresh squeezed orange juice

Use the following to taste:

Ground Ginger

Granulated Garlic

Ground Mustard

Red pepper flakes

Instructions:

Melt 1 tbsp of coconut oil & 1 tbsp of sesame oil in a pan over medium high heat. Place the chicken thighs onto the hot pan. While the chicken is cooking, start cooking the veggies (instructions below)

Coat the chicken evenly with seasonings. Cook for 10 minutes on each side.

Remove the chicken thighs from the pan and let it rest on a cutting board.

In the meantime deglaze the pan by turning the heat to low and adding the juice & coconut aminos to the pan. Add the rest of the seasonings for the chicken to the pan. Scrape the bottom of the pan and stir continuously until the liquid is reduced at least by 1/2 and becomes a glaze.

Pour glaze sauce over the chicken.

Add all the veggies ingredients to the the pan stirring occasionally until cooked through. This should take about 5-15 minutes depending on your veggie choice.

Serve chicken & veggies over cauli rice or regular rice and enjoy! 


So you see? Simple, healthy, and super delicious!

Now next time you're craving Chinese food you won't have to turn to dry chicken and random veggies! Instead you can satisfy your craving while staying on track with naturally healing your skin and balancing your hormones! Yippie!

Seriously though isn't that great news!?

No one wants to feel deprived while eating healthy and you surely don't have to either!

Comment below: what's your favorite Chinese food dish that you miss now that you're healthy?

As always if you need more recipes and inspo just enter your email address below and you'll gain VIP access to my free online resource library packed with tools to make clearing your skin naturally a breeze!

Have an amazing week ya'll and I'll be back in a few days with some new and delicious recipes!


PS: READY FOR NATURALLY CLEAR SKIN & RENEWED CONFIDENCE?
Join hundreds of subscribers and get instant access to my resource library of ebooks, worksheets, and resources for acne sufferers & health seekers alike!

Paleo Copycat Tuna Helper

I want to eat this recipe again SO BAD.

Literally I want it in my mouth like right now. I also may or may not be hungry. But that's entierly besides the point here.

You guys my sister in laws baby shower is this Saturday (today is Thursday) and I am in stress overdrive. Like literally my head might just fall off I'm so stressed.

If I'm being honest it's not just the shower that's stressing me, there are just so many things going on right now that it feels impossible to keep up. This morning during my meditation I was just thinking man I want to run away and do NONE of it. So then I randomly started cleaning. That's sort of my version of running away.

I mean I was doing LAUNDRY. As if doing laundry is better than sitting down and doing payroll, writing this here blog post, or even crafting for the shower. This morning for me it was. WHen I'm stressed I NEED my surroundings to be CLEAN AND NEAT.

My husband really doesn't do much housework outside of the kitchen so it's up to me to keep everything clean. But I also need to give him some major kudos here because he has been helping me out in the kitchen, going grocery shopping, and even cooking for me like such a champ! I swear he's like the most supportive husband ever.

But that doesn't mean he's perfect, just like I'm very far from perfect. Things like laundry and cleaning are just not his forte. He tries, but his version of "clean" and my version of "clean" are two very different things!

Anyway I'm so sorry for rambling on like this - the point is I did laundry this morning to run away from my responsibilities. But here I am bringing you this amazing recipe and I hope it bring you joy and comfort!!

I don't know about you guys but prior to my healthy days I was OBSESSED with tuna helper! It was a staple in mine and hubby's diets and I'd be lying if I said I haven't missed it once since 2013. Because I def have! Which is why I knew I HAD to make this recipe.

You guys it turned out SO WELL.

Even hubby totally loved it and he doesn't eat paleo or very healthy for that matter. Plus he can even be a little picky when it comes to how his food tastes! He's also the greatest. Have I mentioned that? I just love him to pieces and he approves every dish that comes to this blog! OMFG I'M ADD TODAY... So sorry ya'll!

fullsizeoutput_1e6.jpeg

Doesn't it just look delicious?? I made it with spaghetti squash but the sauce alone is delicious over any kinda spiralized veggies and of course it's especially delicious over zoodles!

I know when it comes to eating Paleo to heal your skin you don't want to feel deprived. Heck, the only reason I felt like I could switch to Paleo in the first place was because I found a recipe for paleo bread and I was like "okay maybe I CAN do this paleo thing!" I mean I really get it you guys - I wasn't always this healthy eater.

But I gotta say, every single thing that I've "sacrificed" food wise has been worth it. ALSO none of it has felt like sacrifice. Honestly. I love the way I eat and I do it by choice because the health of my body, hormones, and skin matter to me more than some junk food. #realtalk

So I hope you feel the same way, and if you don't yet that's okay too! Maybe this recipe can help get you one step closer to embracing a paleo lifestyle and seeing that nourishing your body doesn't have to mean dry chicken and broccoli 6 times a day!

Don't get discouraged when people in your life don't GET it. It totally sucks especially when it's your own family but it's also okay, they don't need to get it. All you need to know is that you're making the best possible decisions for your body and just hope that your actions might inspire them to start making changes for themselves as well once they see your results!

Okay I've talked a lot today so let's get on with this thing! Onward ho to the recipe! 


Paleo Copycat Tuna Helper

Ingredients:

Squash:

1 spaghetti squash

3 tsp olive oil

Sauce:

2 cans of tuna

1/2 cup raw cashews

1 cup hot water

1/2 head cauliflower

1 cup organic chicken stock

1/2 Large white onion or 1 small white onion

4 oz sliced baby Bella mushrooms

2 tbsp bacon fat, tallow, lard, grassfed butter or ghee

1/8 cup brewers nutritional yeast

1 tbsp lemon juice 

1 tbsp Raw ACV

1/4 tsp ground mustard

1 tsp granulated garlic

1 tsp sea salt

2 tbsp dried parsley

1/4 tsp oregano

4 tbsp organic grass fed butter or ghee

Instructions:

Soak the cashews in boiling hot water, covered for a minimum of 1 hour, or even overnight. The water will cool as it sits, do not cook them over the stove top.

Preheat oven to 420.

Using a fork, create a dotted line lengthwise (vertically) along your spaghetti squash.

Microwave the squash on high for 2-5 minutes depending on size.

Remove from microwave and with a sharp knife cut the squash in half lengthwise along the dotted line you created with the fork holes.

Use a spoon to scoop out the center seeds and stringy pieces until the cavity has an open space. Use some olive oil and brush both the inside and outside of the squash until completely covered. 

Place the squash halves skin up and face down on a rimmed baking sheet for 1 hour.

While the squash is baking & the cashews are soaking, cut your 1/2 head of cauliflower into florets, pour all the chicken stock into a pot, and steam them for around 10-15 minutes or until fork tender and the stock has mostly evaporated.

While the cauliflower is steaming slice up your onion and mushroom. Place them in a warm pan with a pinch of salt & melted fat of choice (I used bacon fat). Slowly caramelize the onion on low to medium heat keeping the top on at first then removing towards the end. Should take about 5 minutes or until onions are translucent and soft. You've got some time to kill so you might as well let them go for 10 minutes or more to really bring out the flavors. The longer you let them caramelize (cook in fat on low heat til soft) the better they'll taste so there's no rush here!

After the hour is up, remove the squash from the oven and let it cool. 

Pour the soaked cashews in water, seasonings, lemon juice, ACV, butter (or ghee), nutritional yeast, cooked mushrooms and onions, and the cooked cauliflower with any chicken stock left in the pan into a food processor.

Process or blend on high for around 1 minute until everything is smooth and well combined.

Pour the sauce into a large casserole dish and add 2 cans of drained tuna. Take a fork to the spaghetti squash to release the "noodles" and add them directly to the tuna sauce.

Serve with some broccoli or peas, you could stir them in also like traditional tuna helper or just enjoy it like this because it's delicious either way!!

You could also serve this sauce over brown rice noodles for a great gluten free but non Paleo option. It's almost exactly like tuna helper when you make it like that! Yippiee!

Enjoy!


I know I say this all the time but I seriously cannot wait for you to try this recipe out! Especially if you're like me and you were once a tuna helper lover this is totally going to hit the spot for you! Also depending on which tuna helper flavor was your favorite you can also add in some broccoli or peas and carrots. They had a few different flavors that I ate back in the day so I didn't want to limit this recipe to just one or another!

Was tuna helper never your thing? Comment below with some delicious junk foods you used to love and now NEED a paleo version of! I can't wait to see what some of you used to indulge in!

Enjoy this recipe everyone and don't forget to share you success stories with me by tagging me in your foodie pics over on IG with #paleoballerina!

Love you guys and don't forget the free recourses available to you when you enter your email address below! They have helped hundreds of other already!


PS: READY FOR NATURALLY CLEAR SKIN & RENEWED CONFIDENCE?
Join hundreds of subscribers and get instant access to my resource library of ebooks, worksheets, and resources for acne sufferers & health seekers alike!

Hormone Balancing Ombre Gummies

HAPPY VALENTINES DAY!

This holiday is a bit silly in so many ways. Be that as it may you have a choice on how you choose to see it. I personally just use it as another day to celebrate the people we love in a special way. Maybe that's making them their favorite food, getting them a tub of their favorite ice cream, or just giving a sweet and thoughtful card!

I think however you want to do valentines day is the right way to do it. Do what works for you and what feels good. But don't poo poo on other people because they choose to celebrate or not celebrate it. Can we all stop acting like we're somehow superior or inferior because we have differing opinions?

Sorry for getting really soap-boxy today but it just frustrates me seeing all these people who ALL think they're better than someone else because they're doing things a certain way.

Just live and let live people!

Valentines day has never been a huge deal for hubby & I but I usually make him a fancy meal LIKE THIS ONE and we share a good bottle of wine followed by some quality time and maybe a redbox. Nothing crazy, no expensive gifts, but there are usually flowers and chocolates involved and we make sure to celebrate each other. I don't think there's anything wrong with that. I also think it's totally cool if you want to boycott the whole thing because you think it's just another hallmark holiday and an excuse for business to make money. Just don't boycott it because you think it somehow makes you superior to those who are celebrating it... Because all that really makes you is kind of an ass hole. #sorrynotsorry

Again I repeat, you do you boo. Whatever is going to make you happy just do it and let other do the same!

Now let's talk about these damn ombre gummies! Because that's what you're here for, let's be honest!

Aren't they so pretty?

The best thing is that they're yummy and actually REALLY good for you! I combined the hormone balancing power of raspberry leaf tea along with the yumminess of real raspberries, apple sauce, and even a little sour kick with lemon juice!

These are sure to be a huge hit in your house and they're just easy as pie to make! I wouldn't honestly make these and eat a few a day throughout the week if I was currently working to balance my own hormones (wink wink).

Did I mention that they also help to heal your gut, improve digestion, and they're even protein packed? Well they are. And you're officially welcome. Now go make these bad boys!

These are Paleo, Whole 30, AIP, low carb, bikini prep, and Keto, approved. Plus probably other things also but my brain is only half working at the moment because I need to eat some food!

Onward ho to the recipe!


Hormone Balancing Ombre Gummies

Makes 9-12 gummies (depending on cup size)

Ingredients:

1 1/2 cups boiling hot water

1 tbsp cold water

2 scoop gelatin

1 bag of raspberry leaf tea

1 tsp manuka honey

10 raspberries fresh or frozen

Juice of 1/2 lemon

10 tsp apple sauce (no sugar added)

Instructions:

Pour 2 scoops of gelatin and the tbsp of cold water into a bowl or mug. Stir until it become a slushy consistency.

Once thoroughly combined, pour the boiling hot water over the gelatin mixture and stir constantly until gelatin is dissolved. It shouldn't take long at all. Add the tea bag, lemon juice, and honey to the hot water and let steep for at least 5 minutes, up to 20.

While the tea is steeping add 1 tsp of apple sauce to 10 silicone cups (I used standard cupcake sized cups). Once the tea is done evenly distribute the liquid between the 10 cups filling roughly halfway to 3/4 of the way. Lightly stir the apple sauce with the tea, but it should alright be pretty well combined.

Add 1 raspberry to each silicone cup and chill in the fridge for 4 hours or overnight for extra firmness.

You can garnish with some extra raspberries, lemon zest, or even some coconut sugar for extra sweetness!

Enjoy!


I love this recipe because it's both simple and low maintenance & I just think you guys are going to love it. Plus, just seeing how pretty they are personally make me really happy! If yo want them more sour or more sweet just play around with the lemon & honey levels! But the applesauce adds some great clean sweetness so don't go overboard with the honey!

What are some of you valentines day traditions? I's love to hear about them in the comments!

As always, don't forget to enter your email address below if you're looking for more free resources to balance your hormones, clear your skin, and start feeling like a regular bad ass.

I love you guys - have an amazing day!


PS: READY FOR NATURALLY CLEAR SKIN & RENEWED CONFIDENCE?
Join hundreds of subscribers and get instant access to my resource library of ebooks, worksheets, and resources for acne sufferers & health seekers alike!

Chocolate Covered Very Berry Cupcakes

YOU GUYS.

I have huge news.

And I totally can't tell you yet.... But I promise that I will soon!!! <3

Let's talk for a second about these magical cupcakes.... I honestly don't even know what to say about them, they're just SO friggin good. Like seriously!

They're of course paleo friendly and if you made the football cupcakes I shared last week then you'll be very familiar with these! Except for the fact that these are all about the berries! I mean seriously talk about the perfect combination of berries and chocolate but without all the soy, dairy, gluten, or processed sugar!

The best part is that if you're struggling with acne you should be able to eat these without completely pissing off your system! They aren't 100% AIP friendly but I will add those modifications in for those of you who are following AIP but still want a delicious treat!

I mean...

Just look at them!!

How could you not want to put all of those in your mouth hole!? I know I am wishing I had them around again!

As I typically mention on treat recipes, while this is paleo and clear skin friendly they're still not HEALTHY because SUGAR is the devil. Even sugar in natural forms is really just not good for those of you struggling with acne and PCOS. It's super unfortunate I know, but there's never going to be a time that I'll say "EAT ALL OF THE SUGAR, IT'S AMAZING FOR YOU!"

I didn't even eat fruit for the longest time - but for those of you who have my ebook Clear Skin Secrets Revealed you know that I now recommend SOME fruits in limited quantities for specific nutritional benefits!

Okie I'm done rambling now I promise!

Onward ho to the recipe!


Chocolate Covered Very Berry Cupcakes

Makes 1 dozen (12) cupcakes

Ingredients:

Cupcakes:

1 large zucchini peeled

2/3 cup apple sauce (no sugar added)

3/4 cup almond butter, sun butter, or coconut butter for AIP

1/4 cup honey

2 tbsp coconut flour

1/2 cup unsweetened cocoa powder

1 tsp ground cinnamon

1/2 tsp baking soda

3/4 tsp baking powder

1tsp vanilla extract 

1/2 cup enjoy life chocolate chips (carob chips for AIP)

6 strawberries 

Very Berry Frosting:

1 cup organic grass fed butter (or palm shortening for fully dairy free option)

1/4 cup honey

1/4 cup maple syrup*** or omit the syrup & use 1/2 cup honey instead 

4 tbsp coconut flour

4 tbsp tapioca flour

1/4 tsp sea salt

4 tbsp coconut oil melted

7 strawberries separated

7 raspberries

Instructions:

Preheat oven to 375. Shred the zucchini using the shredding attachment on your food processor or shred by hand. Should equal roughly 2 cups of shredded zucchini.

Place the shredded zucchini in a cheese cloth or paper towel & ring out as much liquid as possible until the zucchini feels almost dry. The drier the better so workout those arms!

Add the zucchini with the rest of the ingredients to a large mixing bowl and stir to combine.

Arrange 12 silicone baking cups in a cupcake pan. Evenly scoop the batter into each cup, batter will be thick and it should come up to almost the top of the cup.

Bake for 40 minutes or until a toothpick comes out dry when poked into the center of the cupcake.

Let cool completely, this should take about 30 minutes. 

While they're cooling, wash and slice the strawberries. Can be thin or thick - however you prefer. You can also start working on the frosting (recipe below).

Once cupcakes are cool, take a knife & cut a slit down the middle of each cupcake. Squeeze a small amount of frosting into the hole followed by a slice of strawberry or a whole raspberry. Do this with all 12 cupcakes. Then cover with frosting.

Very Berry Frosting:

Add all of the frosting ingredients except for the coconut oil & berries, to a large mixing bowl. With an electric hand mixer or standing mixer whisk the ingredients together. Then add in 1 tbsp at a time of the coconut oil, pausing in between to combine or continuously drizzle coconut oil as you go.

It should form a smooth frosting texture.

Wash the fruit. Add the raspberries &  trimmed strawberries to a food processor or high speed blender and pulse for 10-30 seconds or until finely chopped and decently well combined. If frosting seems too runny to hold a shape on the cupcakes, you can pop the bowl into the fridge for 5-10 minutes or until it hardens up a bit. But this shouldn't be a problem!

Add berry puree directly to the bowl with the frosting and use your hand mixer, or just stir by hand to combine. The frosting should be nice and pink!

Once the cupcakes are fully complete (refer to recipe above) spoon the berry frosting into a frosting piper (bag) with a spiky edged nozzle. Pipe in a circular motion all over the top of the cupcake adding extra to the center and covering the sides. Pick whatever design you like - they will be cute regardless!

If you don't have a piper you can take a ziplock bag and cut a small hole in the corner then spoon the icing into the bag and squeeze from the top down directly on to the cupcakes. It's not as fancy but it surely does get the job done!

Do this until all the cupcakes are frosted and ready to be eaten! Garnish with fresh sliced berries or other decorations! Store covered in the fridge for freshness - the frosting hardens nicely in the fridge as well and they should stay good for 5 days in the fridge! Enjoy!!


I literally cannot wait to see how yours turn out!!! Please take some ics and tag me in them over on Facebook or IG because I love seeing your renditions of my recipes!!!

As always ya'll are the best and my life wouldn't be complete without you!

Have an amazing day and I hope your valentines day is to die for!!!


PS: READY FOR NATURALLY CLEAR SKIN & RENEWED CONFIDENCE?
Join hundreds of subscribers and get instant access to my resource library of ebooks, worksheets, and resources for acne sufferers & health seekers alike!

Romantic Dinner Paleo Style

When I served this meal to my husband he said (100% seriously I might add)  "whoever made up this sauce is a genius! It's SO good." to which I responded "babe, this is my recipe. I made up this sauce". Needless to say, my husbands mind was blown ya'll!

He's so cute with stuff like that and it's really the ultimate complement because he thought I had just followed a recipe! He loves my cooking which is just part of why I love him. Oh he also taste tests every single recipe on this blog before I publish it! The man works hard! Heheh

He didn't understand how I was able to come up with a sauce like this. But I grantee when you make this whole meal PLUS the sauce, you're going to see just how incredibly simple the whole thing actually is!

DID I MENTION THAT THIS RECIPE IS MADE IN THE INSTANT POT YET!?

Yep, it's a romantic dinner for two (hubs ALSO said it was the fanciest meal he's ever eaten btw) that is sure to leave you both happy and not broken out or bloated for that matter! Isn't that great news? I can't tell you how many times hubs and I would go out to eat a "romantic" dinner and after the fact I just felt fat and full... Kinda the opposite of romantic and sexy yah know?

But you can easily avoid that by making a paleo romantic dinner!!

I talk about Instant Pots a lot and it was a big and exciting upgrade for me! But I'm going to talk about them again here now for anyone who might be newer to the blog or possibly haven't heard of it until now!

If you haven't heard of or invested in an Instant Pot yet I highly recommend that you do so! I literally love mine - it's just really awesome! It makes preparing healthy meals so quick and simple during the week or on the weekends! It cuts the cook time down like crazy (about 50%) compared to using a slow cooker, but it's just as easy. It's a pressure cooker and it also functions as a slow cooker, rice cooker, yogurt maker, and so much more!

For reals, at least check it out and make a note to get one when the timing is right for you!

Now let's look at this delicious food!

fullsizeoutput_228.jpeg

I don't want you to think that in order to enjoy yourself on Valentines day that you have to either eat like crazy, or not eat at all in order to feel good in your body.

Honor your body and your partners body (bow chicka bow bowwww) this year by having a delicious wholesome meal that's also super satisfying. OH and I MIGHT be sharing a fantastic valentines dessert recipe later this week also. Possibly. I can neither confirm or deny that at this point in time. For reals though real food is the way to go!

And HEY all you single ladies and gents: make this for yourself and or you and your girlfriends on Valentines day! (Galentines day anyone!?) Drink a bunch of wine, eat some fancy and delicious food, have a treat and treat yo self to a great experience! I mean there's no reason whatsoever that this meal is somehow exclusive for couples. It's a dinner for one, two, three, four, whatever floats your boat! Not in a gross way but I think you get it?

Do it fo yo damn self!

Okay, I don't really know what else to say at this point besides: make this now and enjoy the heck out of it yah crazies! Or print it out so you can get what you need and make it the day of or something.

Onward ho to the recipe!


Instant Pot Chianti Pot Roast with Asparagus

Serves 2-4

Ingredients:

Pot Roast:

1.5 lbs grass fed pot or chuck roast

2 tsp sea salt

1 tbsp grass fed butter, ghee, tallow, lard, or coconut oil

1/2 large white onion, chopped

1/4 cup chianti wine, separated

2 cup chicken or beef stock (bone broth is best)

Fennel Chianti Sauce:

1 fennel

4oz sliced baby bella mushrooms

1 tbsp grass fed butter, ghee, or coconut oil

Pinch or two of salt

Pinch or two of garlic powder

1/4 cup Chianti red wine

2 tbsp tapioca flour

Asparagus:

1/2 bushel of asparagus

1/2 tsp Himalayan pink salt

1/2 tsp garlic powder

1/2 tsp dried oregano

1/4 tsp turmeric

1 tbsp grass fed butter, ghee, lard, or coconut oil

Instructions:

Pot Roast:

Take meat out of packing and place on a cutting board. Coat with at least 2 tsp salt and massage into the meat.

Let the salted meat rest on cutting board for 5 minutes.

While meat is resting turn your instant pot onto the "sauté" function and melt 1 tbsp butter or other fat of choice. Sear the roast for 1 minute on each side. Use silicone tongs for easy flipping while not damaging the pan & be careful because it gets hot.

**note: if at any point your fat starts to burn be sure to turn off the sauté function as it does get extremely hot. When you're done searing the meat and have removed it from the pot, if the fat left in the pot looks burnt then pour it out and add an additional tbsp of fat before continuing to the next step of adding onions.

After searing the meat on all sides, remove meat from the pot and place it back onto the cutting board. Season with garlic powder & rosemary. Leave it on the cutting board for now.

Throw the chopped onions into the instant pot without draining the fat. If it gets dry then add some extra butter or coconut oil. Sauté the onions until they become soft & translucent, about 5 minutes watching them closely so they don't burn. Then add 1/4 cup of wine and deglaze the bottom of the pot by stirring and scraping up anything on the bottom left from the meat or onions. 

Let the wine reduce by at least 1/2 although it should look like there's almost none left when it's ready. Turn off the pot and add the meat back in on top of the layer of onions. Pour in the broth on top of the roast.

Manually set the instant pot on high pressure for 45 minutes. 

In the meantime cook the asparagus and start on your sauce (instructions for both below).

Once the instant pot timer is done, be sure to first turn it off, then use your tongs to very carefully switch the pressure valve to "venting" and release the pressure again being VERY careful to keep your distance as hot steam will be streaming out of the venting valve.

Once all the pressure is released plate the roast on a serving dish and finish the sauce off in the instant pot.

Asparagus:

Preheat your oven to 425 then rinse & trim your asparagus. Place in a single row on a foil lined baking sheet and cover with fat of choice, salt, garlic, turmeric, rosemary, & oregano. 

Bake for 15 minutes, remove from oven and move asparagus around, then put back in for another 5 minutes or until fork tender.

Chianti Sauce:

Cut off the fronds (wispy green part at the top) of your whole fennel by cutting it in half width wise and set aside. Then cut the bottom half of your fennel in half again length wise and dice up only 1 half into small pieces.

Melt fat of choice in a pan, on medium high heat and add the chopped fennel. Add a pinch of salt and pinch of garlic powder. Stir to coat evenly. Lower the heat to low and cook with the top on mostly, stirring occasionally for about 5-8minutes or until soft.

Turn up the heat again and add the mushrooms. Cook for an additional 5 minutes or until the mushrooms are soft. Add additional pinches of salt & garlic if you'd like.

Pour in 1/4 cup of Chianti wine and deglaze the pan by constantly stirring and getting any brown bits off the bottom. Once the roast is done, wine has reduced, and alcohol has cooked off, add the contents of your pan to the juices left in the instant pot.

Turn on the sauté function and let it boil uncovered for 10-15 minutes stirring occasionally to avoid burning. Take 2 tbsp of tapioca flour in a separate bowl and whisk together with some water until it makes a thin liquid.

Pour this into the instant pot and stir to combine. Add additional salt & garlic powder to taste!

Pour on top of your meat and serve extra on the side!! Garnish with fennel fronds, and enjoy!!!


AHHHHHH reading this over again now makes me just SO excited for you to try it!! I hope that you not only love it but that it makes your valentines day just that much more magical!

I honestly want to eat it all over again..... Like now!

I might even end up making this again for my husband on valentines day... But we just ate it recently so that's not too exciting for him... I try to cook him a fancy meal every year for v-day to void the insanity of restaurants! Ah well we shall see! I surely hope it adds to your night regardless of your relationship status!!!

Comment below - what are some of your valentines day traditions?

And as always if you need more recipes, heal, love, & support in clearing your skin be sure to enter in your email address below to gain access to my VIP Resource Library! 

See ya'll later this week!! <3


PS: READY FOR NATURALLY CLEAR SKIN & RENEWED CONFIDENCE?
Join hundreds of subscribers and get instant access to my resource library of ebooks, worksheets, and resources for acne sufferers & health seekers alike!

Super Bowl Recipe Roundup

You guyssssss why does life fly by so fast?

One day I'm making bite sized recipes with the super bowl in the far distance, and then before I know it the super bowl is TOMORROW! Can you relate? On that note, I hope this isn't coming to you too late! I figure if you wanna make any of these delicious healthy goodies you can hop over to the grocery store today and make it happen!

In other news, I'd recommend if you're hosting a super bowl get together that you made a lot of your food tonight as in Saturday night. Don't wait til game day and stress yourself out. Do as much as you can tonight so that you can actually enjoy the super bowl and not be in stressed out hostess mode the whole time.

I can't be the only one who does that... Right?

Okay I'm gonna make this short and sweet because let's be real, the super bowl is RIGHT around the corner (it's tomorrow) and ya'll are looking for some healthy recipes for it that won't ;eave you broken out, bloated, and otherwise unhappy! I've been posting recipes specifically for this purpose (although they work for other occasions as well) for the past few weeks. So let's review what's been going on! Onward ho!


Paleo Recipes Great for the Super Bowl

Lamb Meatballs

I think it goes without saying why a healthy and delicious finger food like meatballs is always a good option for game day! These are super delish and I've gotten rave reviews and feedback on this recipe! I would probably double it for a super bowl party personally, and you could always serve it with the next item, a delicious and super easy dip!

5 ingredient Best Dip Ever

If the name of this hasn't sold you yet then I don't know what will. This dip is packed with nutrients and probiotics so it's good for your gut & your skin along with tasting delicious. Plus as I mentioned it pairs really well with the meatballs AND with the zucchini medallions that are coming up next on the menu!

Fried Zucchini Medallions

I seriously love giving you guys recipes for things that seem like they should be unhealthy but they're just not! These are both nutritious and delicious! Plus let's be real they look pretty cute too! I gave some important tips in the post of this one for reheating instructions & delicious modifications so be sure to read this one through also! You won't be sorry you did!

Paleo Creamy Buffalo Chicken Dip

AKA the winner of everything this year. Seriously you guys, you HAVE to make this dip for game day, or if not for game day then just make it for yourself because it's AWESOME! It does take a little prep since it's in the slow cooker so be sure to get everything you need before game day! That way you can make it quickly and easily! I can't wait to eat my batch tomorrow!!!

Paleo Chocolate Football Cupcakes

Yes, you read that right. I honestly can't even tell you how good these are. I tried to save some for our Super Bowl party but hubs and I kinda failed. He doesn't even "like chocolate" which I don't actually believe is a thing. These even have some zucchini in them and they're egg free! I gave you guys an AIP modification as well so I hope you enjoy these delicious adorable little treats! 


ALRIGHTY short and sweet today guys! There are a ton of other recipes on my site like the Paleo Mayo, and Butternut Squash that could also be great additions to your party spread! Plus they're honestly really good so everyone will love em! Just make everything bite sized & dip-able with some tooth picks and awesome dips and you're SET!

Think guacamole, fresh salsa, veggie trays, some gluten free bread, and maybe even some pulled pork!

I surely hope this helps yah! That's all for me today! Keep your eyes peeled for a blog post I have coming out VERY soon all about how to choose makeup for acne prone skin yippiee!

Until then, have an amazing day and an even better super bowl Sunday!


PS: READY FOR NATURALLY CLEAR SKIN & RENEWED CONFIDENCE?
Join hundreds of subscribers and get instant access to my resource library of ebooks, worksheets, and resources for acne sufferers & health seekers alike!

Paleo Chocolate Football Cupcakes

To kick off this post I have both sad and horrifying news for you today... Okay here goes....

I HAVEN'T WATCHED THE NEWEST EPISODE OF THE BACHELOR YET.

I know, it's a lot. So just let that sink in for a minute. Now hopefully you've recovered from this news and we can now move onto talking about much more fun things like these adorably delicious cupcakes YAY!

I've just been busy guys, like really really good busy!! I'm even doing my FULL Miracle Morning again and I woke up at 3:40 this AM. It's currently 10:20 in the PM (on Wednesday) and my eyeballs feel like fire balls, and not the fun alcoholic kind.

Are you bored of me saying I'm busy yet!? I've been so super happy and grateful for life recently that I'm just living every minute of it to the fullest & I will set aside time AT SOME POINT to watch The Bachelor since it's the only show I'm semi regularly watching at the moment.... Hopefully it'll be soon. And for those of you reading this post not on 2/2/17 well carry on, and hopefully you still understand my struggs & I haven't bored you too much in the process yet.

CUPCAKES.

If you were to just to eat these without any prior information you would never know the secrets that they hold... It's like Mean Girls ("I heard her hair is so big because it hold so many secrets") but the food version. Because these crazy delicious bad boys have a ton of secrets...

Maybe not a ton but they sure do have some, and they're juicy! Like the fact that they're totally egg free, fully paleo friendly aka dairy, gluten, soy, legume, & refined sugar free PLUS they have ZUCCHINI in them! They can even be made nut free and with carob if you like for AIP!!! Versatile and delicious, YAAAAASSSSSSSSSS!!!!!!

You would never know all that from just tasting them! They taste better than a store bought brownie or cupcake mix. I really honestly believe that. They have a rich delicious chocolate flavor, stellar texture, and they're kind of to die for.

Only problem is that having them in your house will make you want to eat them. But the good news is that they're so rich that you really only eat one at a time! And trust me, I'm not a moderator.

Unless you don't like chocolate like my husband....

In which case, you'll probably eat one and then another anyway and just pretend not to like chocolate. Because not liking chocolate is a lie, and lying is a sin guys. So you're just making a sinner of yourself by not admitting the truth that CHOCOLATE IS LIFE.

There's even frosting TWO ways!

Aren't they so cute and fun!? The little spiky ones are actually supposed to look like green** grass although the green doesn't show up in the pictures very well. And after the fact I realized that I probably should've used a different frosting attachment. But they're still cute so I'm okay with it!

**no food coloring was used in the making of these cupcakes.

I think it's pretty obvious that the other ones are little footballs! I also used brown SILICONE baking cups and they're the best. The cupcakes literally just pop right out when they're done! No sticking or mess whatsoever. If you decide to make only the footballs and not the grass you can probably make just a half batch of the frosting because it uses almost none! These are good even with no frosting so the taste is delicious regardless!

I honestly just love how cute they are! And the green frosting is just fun!

But please do keep in mind that no matter how "healthy" or "paleo" these are, they aren't going to make you healthier. They aren't going to make your skin clearer. But they also won't make you break out even more unlike other conventional treats.

They also won't make your inside like "YAY SUGAR!" (your brain will of course) but I think it's TOTES worth it to treat yo self sometimes! It's not worth going through life feeling deprived. Just don't make it a weekly, or daily thing if you're trying to heal your skin. Mkay beautiful?

Remember: Sugar = inflammation and Inflammation = Acne.

Using natural sugars in moderation will hopefully allow you to have some treats without breaking out like a crazy person though which is the good news. But just be aware, a treat is still a treat! On that note, ENJOY these bad boys and don't forget that it's all about balance my friends!

Onward ho to the recipe!


Football Chocolate Cupcakes

IMG_1335.JPG

Makes one dozen cupcakes (12) cupcakes

Cupcakes:

Ingredients:

1 large zucchini peeled

2/3 cup apple sauce (no sugar added)

3/4 cup almond butter (use coconut butter for AIP)

1/4 cup honey (reduce to 1/8 cup for AIP - carob adds natural sweetness)

2 tbsp coconut flour

1/2 cup unsweetened cocoa powder (use 1/4 cup carob powder for AIP)

1 tsp ground cinnamon

1/2 tsp baking soda

3/4 tsp baking powder

1tsp vanilla extract 

1/2 cup chocolate chips (omit for AIP or just carob chips)

Instructions:

Preheat oven to 375. Shred the zucchini using the shredding attachment on your food processor or shred by hand. Should equal roughly 2 cups of shredded zucchini.

Place the shredded zucchini in a cheese cloth or paper towel & ring out as much liquid as possible until the zucchini feels almost dry. The drier the better so workout those arms!

Add the zucchini with the rest of the ingredients to a large mixing bowl and stir to combine.

Arrange 12 silicone baking cups in a cupcake pan. Evenly scoop the batter into each cup, batter will be thick and it should come up to almost the top of the cup.

Bake for 40 minutes or until a toothpick comes out dry when poked into the center of the cupcake.


Frosting 2 ways:

Ingredients:

1 cup organic grass fed butter (or organic palm shortening for fully dairy free option)

1/4 cup honey

1/4 cup maple syrup*** OR omit the maple syrup & just use 1/2 cup honey if you don't like the 'maple' flavor (like my husband) 

4 tbsp coconut flour

4 tbsp tapioca flour

1/4 tsp sea salt

4 tbsp coconut oil melted

1 tsp liquid chlorophyll (mint flavor is fine)

Instructions:

Add all ingredients except for the coconut oil & chlorophyll to a large mixing bowl. With an electric hand mixer whisk the ingredients together. Then add in 1 tbsp at a time of coconut oil, pausing in between to combine or continuously drizzle coconut oil as you go.

From here if you want to make the frosting green for the "grass" then take 3 tbsp of the finished frosting with 1/4 tsp of chlorophyll into a separate bowl and stir to combine. This should cover about 2 cupcakes. Depending on how many you want to cover with green & how you choose to frost them, continue this process using the same ratio of frosting to chlorophyll.

Put the green frosting into a frosting piper with a spikey edged nozzle and place little dots of green "grass" all over the top of the cupcake.

If you don't have a piper you can take a ziplock bag and cut a small hole in the corner then place the icing into the bag and squeeze from the top down directly on to the cupcake through the hole using the same method as above.

Once you're done with the green, wash the bag (or grab a new ziplock) and now fill it with the rest of the white frosting. Use a fine tipped nozzle if using a frosting piper, or cut a very small hole in the corner of your ziplock.

Squeezing out the white icing from top to bottom draw one long line down the center & 3 going across to make little footballs out of your cupcakes. A little goes a long way for the football lines so you can always mix and match to your preferences!

Cover & store iced cupcakes in the fridge for freshness & firmer frosting. ENJOY & have fun with em!


YA'LL THESE ARE SO GOOD.

The only thing that sucks is that even natural sugars still aren't good for you. Because sugar is the devil and the ultimate inflammation causing ingredient like EVER. Granted these natural versions are def better for you than the processed stuff, but I know my skin HATES when I have anything sweet besides fruit.

SO make sure if you're having sweets of any variety that you give our gut some extra support with the tips that I specified in THIS POST. Especially the ACV thing. Get on that like ASAP yo!

Don't forget if you want the skinny on getting clearer skin naturally you've gotta enter your email address below to get all of my free clear skin resources! There's ebooks, checklists, worksheets, printables and more!

Okie that's it for me today loves, ya'll are just SO awesome and I can't tell you enough how much I appreciate every single one of you!

We are a participant in the Amazon Services LLC Associates Program, an affiliate advertising program designed to provide a means for us to earn fees by linking to Amazon.com and affiliated sites.
This does not cost anything to you or alter the prices you pay in any way.

PS: READY FOR NATURALLY CLEAR SKIN & RENEWED CONFIDENCE?
Join hundreds of subscribers and get instant access to my resource library of ebooks, worksheets, and resources for acne sufferers & health seekers alike!

Paleo Creamy Buffalo Chicken Dip

Are you looking for a last minute Super Bowl Party Recipe that won't leave you bloated & broken out? Well you've come to the right place!

Let me just start by saying, holy crap you guys I have been SO busy recently. Like not a free second to myself. It's been cray cray & to my own surprise I kinda love it! I don't like the stressful moments, but as long as I stay organized I feel okay!

It's Tuesday and I haven't even watched the new episode of Bachelor that came out last night! *insert 'home alone' shocked face*

To be fair I have been staying up late at night reading for pleasure... But it's time I SHOULD be sleeping... SO I feel like it really doesn't count as 'free time'. I was reading two different books my friend Kelly leant me called Graceling & Fire both by Kristin Cashore. Those books were just so good I couldn't put them down by sleeping!

Now that they're done I'm back to adulting and actually sleeping at decent hours. Do people still stay up late reading these days? Am I like way in the stone age to be doing this? Regardless, if you liked books like The HungerGames, Harry Potter, His Dark Materials, and other things of this nerdy variety, you will love these books.

I know you guys didn't come here to hear how I'm doing, nor did you ask for book recommendations - you just want this magical recipe, and that's what I'm here to give you so let's move on! Let's make your life more so magical with this here recipe!

Because you should be able to enjoy CREAMY delicious goodness without worry about your skin breaking out for a week after the fact or some crazy bloating!!! RIGHT!?

So I want to give you a little back story on this dip first. Because I have a relationship with this dip and it goes way back! Also I do want to say, if you're following AIP (Paleo Auto-Immune Protocol) or not eating nightshades right now... Then I am very sorry. You could however just sub the hot sauce with chicken broth and make a white dip instead?

Just a thought.

Okay so YEARS ago I think maybe 7 years ago now I found this buffalo chicken dip on allrecipe.com and I used to make it every year sometimes multiple times in the year. Because I loved it just that much and I loved sharing it's amazingness with people. Duh!

Hubby and I would eat it with tortilla chips, or big baguettes of bread. I made it (and still sometimes make it for parties, I just don't eat it) for the super bowl, new years parties, by brother made that recipe for his students when they had a potluck thing, and it was honestly just awesome.

If you've EVER attended one of my parties, you have probably eaten this unhealthy dip. Because I know it's delicious and if I didn't eat healthy than I probably would've eaten it also! I mean clearly, because I used to eat it.

Needless to say with ingredients like sour cream, cream cheese, shredded cheese, and ranch dressing - I haven't eaten that shit since 2012. Because I'm sorry but those ingredients are NASTY. Plus I'm not about that life. 

But that doesn't mean I didn't MISS the heck out of that delicious nastiness. Because I did.

ENTER THIS MAGICAL DIP.

I was inspired by the dip I so missed eating and I knew I had to set out to make something that could stand up to that old unhealthy dip that was a staples in our diets. And I'm happy to say that I HAVE!

Even my husband super loves this recipe and you guys it's legit PALEO. I promise I didn't use and cheese or heavy cream in this bad boy but it's creamy nonetheless. It does take a bit of time and work since you make it in the slow cooker, but it' totally worth it.

Personally I made a batch in the crock pot yesterday and it's currently sitting in it's pot in my freezer. The pot is what the dip is in, in the pictures here, and it goes directly into my mini crock pot. On game day I'll take it out in the morning and have it heat up in there on low all day.

Can you say delicious perfection? I can!

Quick note: I gave options below using butter, ghee, or coconut oil. The flavor is BEST with butter or ghee, but coconut oil is a suitable alternative as well! Just decide based on what works best for your body right now! Okie... Let's move on to this recipe! 


Paleo Creamy Buffalo Chicken dip

fullsizeoutput_1bf.jpeg

Cook time: 4 hours Serves 6-10

Ingredients:

1.5 lbs Organic Boneless Skinless Chicken Thighs

1/2 cup Franks Red Hot Sauce (add 1/4 cup more for even spicier dip!)

1/2 cup raw cashews

1 cup hot water

1/2 head cauliflower

1/2 cup organic chicken stock or bone broth

1/8 cup brewers nutritional yeast

1 tbsp lemon juice 

1 tbsp Raw Apple Cider Vinegar (ACV)

1/4 tsp ground mustard

1 tsp granulated garlic

1 tsp sea salt

2 tbsp dried parsley

4 tbsp organic grass fed butterghee or coconut oil for fully dairy free option)

1 green onion for garnish

Instructions:

Place the raw chicken into the crockpot with the hot sauce on high for 4 hours. At the same time place the raw cashews into a separate bowl and cover with boiling hot water. Cover and soak the cashews for about 4 hours or until the chicken is done.

When the chicken has about an hour left, cut your 1/2 head of cauliflower into florets. Add chicken stock and cauliflower florets to a separate pot and steam for around 10 - 15 minutes or until fork tender and the stock has mostly evaporated. The longer the better.

In a food processor or high speed blender add the soaked cashews (with soaking water), seasonings, lemon juice, ACV, butter, nutritional yeast, and cauliflower with remaining chicken stock from the pot and process.

Process on high for around 1 minute until everything is smooth and completely combined.

Once the chicken is done, shred the chicken using two forks directly in the crockpot. There will be a lot of liquid, don't drain it! The chicken should fall apart easily. Then pour the "cheese" sauce mixture from your food processor into the crock pot over the spicy chicken and stir well to combine.

Let the flavors blend in the crockpot for at least 5 minutes or make a day in advance for a fuller flavor. It tastes best after at least an hour or overnight!

Slice and garnish with green onions.

Serve with corn free tortilla chips like these Siete ones, fries, celery, broccoli, or some gluten free bread and enjoy!


Okay I know that might seem like a lot but man oh man this dip is so good. As I mentioned mine is sitting in my freezer right now just waiting for game day in a few days! I'll be curious to see if any of my guests can tell it's paleo or at the very least dairy free... I'm thinking NOT!

Per usual, if you want more helpful resources for healing and clearing your skin naturally, be sure to enter you email below and gain access to my free Resource Library that's filled with recipes, worksheets, checklists, and my free ebook: Real Food Acne Detox!

AND if you're on social media be sure to tag #paleoballerina when you make my recipes for a chance to be featured on my feed! Yippiee!!

Okie have an awesome week everyone and keep your eyes peeled for a super fun super bowl TREAT that's coming later this week (hint: on Thursday)!

xoxo -.png

PS: READY FOR NATURALLY CLEAR SKIN & RENEWED CONFIDENCE?
Join hundreds of subscribers and get instant access to my resource library of ebooks, worksheets, and resources for acne sufferers & health seekers alike!

5 Ingredient Best Dip Ever

This 5 ingredient dip is perfect for Super Bowl parties, afternoons at the winery, and really any other get togethers. I know the name is bold, but I think once you try this dip you'll see why I named it this way!

Wanna know the best things about this 'best' dip? It’s beyond easy to make, it's delicious, and it only has 5 ingredients! If I had an event coming up like oh I dunno THE SUPER BOWL (or anything else if you're reading this at a non super bowl time) then I’d make a big batch in advance to serve up at any fun event, or even to bring with you to an event you’re attending.

OH ALSO ALSO...... The Patriots are going to the Super Bowl again!!!! I've been a Pats fan since I was like 5 years old and I'm so excited that we're going back to the super bowl again this year! I'm so proud of my boys! 

Okay sorry, back to the dip.

I initially created this dip one afternoon to dip olives, cucumber, and smoked salmon into, which is why is has a bit of a greek mediterranean flavor to it. It is really great as a dip for chips, fries, or even chicken tenders. It also pairs extremely well with my Lamb Meatballs or Fried Zucchini! If you want to make this dip a little more tangy to serve with the lamb meatballs or falafel I would even squeeze in some lemon juice and sprinkle some oregano on top!

But seriously, there are just so many delicious foods to have this with. For those of you who are familiar with tzatziki sauce it’s a little bit similar to that except that there’s no cucumber in it and no fresh garlic. But if you want to spice it up even more you could use some minced garlic and shredded cucumber in the dip as well! It’s really versatile so no matter what kind of dishes you’re planning to serve you can tailor this recipe to suit your flavor profile!

Even with all the amazing things I’ve already listed, really the very best part aside from the flavor of this dip is that it's safe for those of you who don’t tolerate cow's milk since it uses goats milk yogurt, it’s junk free, AND it is packed with healthy probiotics to aid in digestion and keep your gut in check with all the other things you might be eating and drinking at parties! Yippie!!

Important Note:

For those of you on here who are like "UHM THIS ISN'T PALEO" well you're not wrong. But if you've ever read my blog post all about the Paleo diet I talk a lot about finding food that work for you and your body. I've been Paleo for almost 4 years. It's a long term lifestyle decision for optimal health, not some crazy diet fad that I'm doing.

For me, goats milk is one of those things, and especially goats milk YOGURT with it's probiotics, that my body seems to really like. I try to get a little goats milk yogurt in every day usually in a smoothie with ACV (Apple Cider Vinegar to help the probiotics flourish) or just a few spoonfuls on it's own. The goat's milk yogurt has done wonders for my skin and gut health, and I love it!

If you're just at the beginning (as in first 30 - 90days) of healing your skin & gut through dietary changes then this dip might not be for you. At least not right now. But honestly I don't think it hurts to try it out and see how your skin and gut responds!

Now onward to the recipe!


5 Ingredient Best Dip Ever

Makes 1 cup of dip. 5 Minutes Prep Time.

Ingredients:

1 cup Goats milk yogurt

1/4 tsp Ground mustard

1/2 tsp Ground garlic

1/4 tsp Himalayan Pink salt

2 Pinches of Fennel sprigs 

Instructions:

Combine all the ingredients in a cute serving dish but reserve 1 of the fennel sprigs pinches for garnish. Make it a day in advance and store in the fridge to enhance the flavors.

Serve with cured meats, cut up veggies, lamb meatballs, or any other small finger foods. Enjoy!


I mean..... 5 ingredients and it's literally just THAT easy. It really doesn't get much better than that IMO.

Do you think this qualifies as the best dip ever?

Omg also you guys, be sure to enter your email address below to subscribe to my mailing list because I have a DELICIOUS recipe for the super bowl that I'm sharing next week to my subscribers only! I know, I know, you don't want another subscription, but I promise I never spam & I like to give exclusives to my subscribers!

Next week you can expect a few more delicious Super Bowl and general party finger foods coming to the blog! So get ready and get excited!!

Have an amazing day everyone and don't forget to tag me in your food creations over on IG for a chance to be featured on my feed!!

PS: READY FOR NATURALLY CLEAR SKIN & RENEWED CONFIDENCE?
Join hundreds of subscribers and get instant access to my resource library of ebooks, worksheets, and resources for acne sufferers & health seekers alike!

Fried Zucchini Medallions

These fried zucchini medallions are pretty much zucchini fries that I made into medallions instead of fries! I love me some variety! If you don't want them to be circular you could just cut them into the shape of fries and call it a day. I just liked the little circles so here we are!

Zucchini is one of my favorite veggies EVER.

When I was little (really until I was in my late teens) my mom used to hide zucchini in mine and my brothers our food because we refused to eat any veggies. So she would secretly peel and shred up zucchini and add it into anything she could like her burgers, meatballs, and a ton of other dishes.

That gives you a bit of insight into me and my unhealthy ways of the past. Veggies were a no no altogether. And to you parents out there, you should try out this little hack my mom did, it might work for you like it worked for her! We didn't notice it until years down the line and at that point we liked it anyway so we dealt with it.

But that's not the point here. The point I'm actually trying to make is that zucchini has a mild flavor and it's very versatile! These days I'm sure you've seen everyone go crazy over some zoodles! They are literally zucchini put into a "spiralizer" and cut into the shape of noodles! Genius right!? I LOVE zoodles, but theres also a lot more you can do with zucchini other than just spiralizing!

That's where this recipe comes into play! Plus let's be real, anything fried is just delish, and in this case it's healthy too!

Leftovers tip:

I actually ended up eating these as a leftover with some goat cheese and tuna salad. I threw the medallions on a baking sheet, put a little slice of goat milk cheddar cheese on top of each medallion, and broiled them on high for about 5 minutes.

If you're eating these as a leftover in general I definitely recommend using this broiling method even without the cheese. Otherwise these can get a little soggy sitting in the fridge overnight and they don't taste anywhere near as good as they do when they're fresh. BUT if you broil them it brings that crispy crunch back and they're still delish. Again I paired my medallions with some tuna salad (made with my paleo mayo of course) and I gotta say they were pretty friggin BOMB! Especially if you can tolerate goat cheese (not something I recommend if you're just starting on your natural clear skin or paleo journey) then you need to try this little modification out for extra  yumminess! I mean YOLO right!?

fullsizeoutput_e8.jpeg

These would ALSO be great for a super bowl party or a classy get together!

If you make them for a party then you won't even have to worry about leftovers thats for sure! Pair them with my 'the best dip ever' recipe that I'll be posting later this week (on Thursday cough cough).  It's very yummy and full of probiotics for gut health! YAY!

Last but not least, before I set you free to make this delicious recipe I wanted to mention something. The most recent recipes I've shared have ALL been small bite sized type of foods for convenience. This was totally done on purpose.

I can't tell you enough just how important it is to have little things here and there you can grab to eat. With the Super Bowl right around the corner some of the recipes are more geared towards little dishes you can serve at a party, but all in all good food is really universal don't cha think?

These zucchini medallions are Paleo, Whole 30, Keto, Low Carb, Bikini Prep, Vegetarian, and Clear Skin diet friendly! Possibly other diets friendly as well, but you can determine that for yourself!

Now let's move onto the recipe!


Fried Zucchini Medallions

Serves 4-6

Ingredients:

2 small or one large zucchini, peeled

1 egg

5 tbsp nutritional yeast

2 tbsp full fat coconut milk

1/2 tsp garlic powder

1/2 tsp oregano

1/2 tsp parsley

Pinch of salt

3 tbsp tapioca starch

About 1 inch in the pan of melted Bacon fat, tallow, lard, butter or coconut oil.

Instructions:

Cut the peeled zucchini into 1/2 inch think circle medallions.

Using three regular bowls make a small assembly line. In the first bowl place the tapioca starch, in the next mix the egg & coconut milk, and the last one with have the rest of the dry ingredients including the nutritional yeast & seasonings.

Using separate hands for dry and wet ingredients dip each zucchini medallion first in tapioca starch, then the egg wash, then the nutritional yeast & seasoning mixture.

Place the fully coated zucchini directly on the warm pan with melted bacon fat on medium high heat. Depending on the pan size you'll need more or less bacon fat. It should come up to about 1 inch of the pan. Repeat these steps with the rest of the zucchini until the pan is full. Flip once during cook time, roughly 6 minutes total. Repeat the same steps until you've used all of the zucchini. There should be little to no coating left once all the zucchini is used.

Garnish with parsley & lemon juice. Immediately serve warm & Enjoy!

Please read above for full reheating tips for leftovers! Broil for 5 minutes.


Well then I hope those instructions make sense to everyone and I hope you enjoy these yummy little medallions! I know I surely did. Also writing this post is making me super hungry. Time to go eat!!

And don't forget, if you're looking for more recipes to balance your hormones and get your skin on track naturally then enter your email address below and you'll get access to not only my ebook: Real Food Acne Detox, but you'll have get free checklists, worksheets, and everything else in between!

Ya'll are amazing, have a great day!


PS: READY FOR NATURALLY CLEAR SKIN & RENEWED CONFIDENCE?
Join hundreds of subscribers and get instant access to my resource library of ebooks, worksheets, and resources for acne sufferers & health seekers alike!

Paleo Lamb Meatballs

I feel like I really shouldn't have to specify at this point if a recipe is paleo or not because you guys know me... But I want to accommodate those of you who might be new to the blog and might NOT know me! Because I love you just for being here no matter how long you've been along for this ride!

Okay so before I dig into this fabulous recipe today can I just tell you guys... I think I took my best ever, or at least best yet food photo EVER!? My husband wasn't impressed with it but sheeiitt I am! And you're going to see it here in this blog post! I mean I realize it's super dorky to be SO excited about something like that but I TOTALLY AM!

In other news, I'm officially starting to share 2 recipes a week on this here bloggity blog! I know you want to clear your skin & get your health on track and I want to support you in doing that as best I can! They're of course geared towards those of you who are trying to balance hormones, and clear you skin naturally using some bomb ass REAL FOOD! Yippie!

Also I just realized that I think I say the word  'yippiee' in every blog post I write. I'm a total tool sometimes but I'm also totally okay with it! I think I'm also pretty cool even though I say things like 'yippiee' far too often via text. I don't know how people go through life and take themselves so seriously ALL the time. I just can't hang on that level. I just can't!

I am in super productivity mode these days because the hubs isn't working at the moment so yah home girl is teaching as often as possible, & I am even picking up a new job on the weekends about 4 hours away from home with my brother in law! Plus well... Just everything else I already have going on from running this blog, everything else this amazing job entails, getting in my own workouts, planning a baby shower, and everything else in between!

Totally random but since I'm oversharing today, I designed and am currently printing the invitations to my brother & sister in law's baby shower that mentioned above. My friend Laurene and I are planning the shindig but she's all the way in Cali, so it's been stressful with everything else but it is also SO EXCITING, squeee! In just a few short months I'll have a new nephew!!! Anyway, I feel like I'm winning at life with this multitasking right about now, and that is all.

I'm not going to sit here and list off everything I have going on because you don't need to know all that! But I'm oddly just happy these days. Yesterday was a shit show, but that's just gonna happen sometimes and it's a okay! I'm going out of town tomorrow for that new job and I can't wait to get a TON of stuff done on the bus. Like I'm actually SO excited to have uninterrupted work time!

Just me, my macbook, my beats, and a notebook. Sounds like heaven.

I have to say, I'm nowhere near perfect at this job of owning my own company, being a blogger, youtuber, and everything else but I really love it. I really really do. I LOVE helping you and seeing your lives TRANSFORM. It's awesome. I have some big updates on that front that I'll be updating ya'll with. But I might wait til around April-ish to dish on all of that!

RECIPE TIME!

This recipe is delicious and it's the bomb and you should just make it okay? it's super easy and simple, so just go make it already! Oh wait, but look at the pictures first!!!

Aren't they pretty?

The reason these pictures mean so much to me is because I let my lack of knowledge and the fact that "there are so many people out there already doing it better than me so why should I bother" stop me from TRYING when it came to paleo clear skin food blogging. I've always felt self conscious about my food photography. But I'm FINALLY starting to gain some confidence!

Anyway...

These meatballs work amazingly well in a meal prep, serve them in a salad, throw em in a soup, have them with some tabbouleh, & sauerkraut (OMG YUMMM) or just serve them on their own as little bite sized appetizers like for the SUPER BOWL!

THESE WILL MAKE AN AWESOME ADDITION TO YOUR SUPER BOWL SPREAD!

I would DEF make at least a double batch of these if you're making em for a party. I would probably also serve them with something to dip like my amazing goat milk yogurt based dipping sauce that I'll be posting on the blog next week! These meatballs with that dip is just like magic. My mouth can't even handle it right now as I'm typing this.

Earlier this week I actually threw some of my leftover meatballs into a bowl with spinach & some balsamic dressing and it was amaze balls! This recipe is versatile which is why I love it. We usually host a super bowl party so if we do this year I'll more likely than not be making these again!

These are of course Paleo, Whole 30, AIP (omit the cumin & mustard), Clean Eating, Low Carb, Keto, Clear Skin Diet, & just about every other diet friendly!

Lamb has some great nutrient properties like ZINC and of course things like protein, vitamin B & magnesium. But the zinc in lamb alone should sell you on just about any lamb recipe if you're looking to clear your skin with real food. Zinc is insanely great for your skin, especially acne prone skin, and getting zinc in it's purest form directly from food is the best way to get it because our bodies can actually use it and use it efficiently!

Okay onward ho to the recipe!


Lemon Herb Lamb Meatballs

Makes about 15-18 meatballs

Ingredients:

1lb ground lamb

1/2 tsp sea salt or Himalayan pink salt

Juice of 1/2 lemon plus more for garnish

1/2 tsp dried oregano 

1/4 tsp turmeric

1/4 tsp cumin

1/4 tsp ground mustard

1/8 tsp thyme

1/4 tsp rosemary

1/2 tsp granulated garlic

Instructions:

Preheat oven to 375.

While oven is preheating add all of the ingredients into a large mixing bowl. using your hands fully incorporate all of the ingredients until all the seasonings are evenly distributed in the meat.

Using you hands form the meat into small balls using about 1 1/2 tbsp of meat for each ball. Place the meatballs into a glass baking dish and bake uncovered for 15 mins.

Remove from oven & flip each meatball. Put back in for 10 more minutes or until cooked through.

Garnish with extra lemon juice and some fresh or dried parsley and ENJOY!


I really hope you enjoy this recipe because it's one I'm particularly proud of... But let's be real I'm mostly just proud of these pictures HAHA. It's like I'm finally becoming a REAL food blogger because I'm finally taking the time to stage, & edit my pics. Plus I'm using the real camera & not my phone. It makes me happy, and I hope that the better quality photos and frequent recipes are making you happy too!.

I have to run to staples to cut these printed invites (and yes they're done printing now) then go teach ballet! Then it's gym time, then I need to pack for tomorrow and make sure I have everything ready for that bus ride!

I just love you guys to pieces. Keep being amazing, keep hustling for the life you want, & don't forget to show some love towards yourself this weekend! Also if you are looking for more of my skin clearing resources & recipes, don't forget to enter your email below for access to my resource library packed full of ebooks, worksheets, & printables for you, plus weekly goodies!

Happy Friday ya'll!


PS: READY FOR NATURALLY CLEAR SKIN & RENEWED CONFIDENCE?
Join hundreds of subscribers and get instant access to my resource library of ebooks, worksheets, and resources for acne sufferers & health seekers alike!

Bacon Spinach Egg White Muffins

Hey girl, are you trying to clear your skin by cleaning up your diet but you can't find the time to do all that cooking? I see you working hard so I created this super easy recipe for you, to make your life easier.

The struggle is real, I totally get it. But I also know that you want clear and glowing skin & cleaning up your diet is a hugely important part of doing just that! That's why you make your nutrition a priority right!? RIGHT!

Especially for those of you who are busy day in and day out and barely have a minute to think by yourself let alone cook 3 gourmet meals a day. For really's though, if you make this batch and (obvi) eat 2 the day you make them, then store the rest in the fridge (or freezer if you make a bigger batch), you'll have breakfast for 5 days (assuming you'll eat two a day).

You can pop them in the microwave, pop em in the toaster oven, or even put them in your actual oven to heat them up in just a few minutes. Or you can be the ultimate lazy like me and just eat em cold! Ain't nobody got time to heat up food! Sheeeiiitttt.

I just had 2 of these egg muffins for breakfast today with 1/2 a sweet potato and it was essentially perfection. I was fueled, full, and because they tasted so good I felt really satisfied. The thing I have to say is amazing about these muffins is that they're easy to make, super easy to store & eat, the clean up was almost painless ('almost' because all cleaning hurts a little bit), they're delicious, and they even pack a great nutritional punch. It really doesn't get much better than that am I right!?

IMG_0923.JPG

As someone with acne and or possibly PCOS I can't stress enough how important it is for you to EAT all your meals during the day. Nothing will keep your body in a state of unhappiness & need than depriving your body of food. I'm not saying to run out and pick up McDonalds anytime you're hungry, but you're body is essentially screaming at you to give it more nutrients - so you best comply if you want your skin to have the pretty ass glow like Kim Kardashians bronzer.

In just one of these muffins you've got protein, iron, choline, healthy fats, potassium, magnesium, a ton of vitamins and ingredients like turmeric to help with anti-inflammatory properties! Everyone of these is going to get you that much closer to a fully nourished body and therefore much happier skin. It takes time but every healthy meal you eat HELPS! Yay!

Speaking of nutrients, have you downloaded my free nutrient tracker yet? If not, then you need to get on that like NOW! It's available fo free in my resource library and it's an awesome way to keep track of not what you're eating, but the kind of nutrients you're eating daily! Just click this image below to gain instant access:

Click here to gain access to my free resource library &amp; instantly download my nutrient tracker!&nbsp;

Click here to gain access to my free resource library & instantly download my nutrient tracker! 

This recipe is Paleo, Keto (low carb), & bikini prep friendly! AKA clear skin friendly!

I'm sorry if you can't eat eggs right now or if you're doing AIP - this one isn't for you. I know I had to go off of eggs for a little while myself because they irritated my skin and it took a little while before I could add them back in. BUT the good news is that I tolerate them very well now so I can benefit from all them nutrients! If that's you then just make sure to pin this post (on pinterest) and save it to make later once you've reintroduced eggs!

On that note, onward ho to the recipe! Enjoy ya'll!


Bacon Spinach Egg White Muffins

Makes 12 Egg Muffins

Ingredients:

8 egg whites (2 1/2 cups)

2 whole eggs OR 10 whole eggs & no egg whites

1/2 cup full fat coconut milk

1/2 tsp sea salt

1/2 tsp garlic powder

1/4 tsp oregano

1/2 tsp herbs de province

1/4 tsp ground mustard

1/4 tsp turmeric

2 cups chopped spinach

6 slices raw uncured bacon

Coconut oil for greasing muffin tin

Instructions:

Preheat oven to 350. Chop bacon into small pieces and cook in a pan. 

While the bacon is cooking add the rest of the ingredients besides the bacon to a large mixing bowl. Stir well to combine.

Grease the muffin tins with a light layers of coconut oil, or using silicone muffin liners.

Once the bacon is cooked through evenly distribute the bacon between 12 greased muffin tins. Do the same with the seasoned egg and spinach mixture evenly distruibuting between the 12 muffin holes until it's all used up - it should go up to about 3/4 full .

Bake for 25 minutes. Remove from the oven and let them cool in the pan for 5 minutes.

Remove muffins from tin and enjoy! Store in an airtight container in the fridge for 5 days or the freezer for 3 months.


As always I hope you not only enjoy this recipe but I hope it makes your lives easier, and your skin clearer! Don't forget to share your creations with me for a chance to be featured on my page by tagging #thepaleoballerina on all your foodie pictures over on IG!!

Tried the recipe already? Let me know your honest opinion in the comment below or if there are any other recipes you'd like to see in the near future! Until then, have an amazing day! 


PS: READY FOR NATURALLY CLEAR SKIN & RENEWED CONFIDENCE?
Join hundreds of subscribers and get instant access to my resource library of ebooks, worksheets, and resources for acne sufferers & health seekers alike!

Paleo Staples - Butternut Squash Recipe

Well hello there! Listen I know you're busy, I know ain't nobody got time for cooking for hours to clear your skin. But this recipe is totes worth it and it's easy peasy! 

Today I have a delicious roasted butternut squash recipe for you in my Paleo Staples series! This recipe is a bit overdue, but here we are and I'm super excited to share this recipe with you!

Butternut squash is amazing for your skin! Not only is it a great Paleo carb source but it's packed with Vitamin A, Vitamin C, Magnesium, Calcium, and of course carotenoids! These carotenoids are the same ones found in things like carrots, pumpkin, and other orange veggies. That's where the Vitamin A is packed and the reason you'll see any such orange veggies quoted as beneficial for your health! 

I have to say when Butternut squash is prepared right it is SO good!!! I usually buy it already cubed, and it can go bad pretty quickly once you buy it so be sure to use it the same day or at least within a few days of your purchase! It's in season right now though so live it up and go to town!

Food going bad before you get a chance to use it is like the saddest thing EVER though so don't let that happen to you! Learn from my mistakes friends. Learn from my mistakes....

I made yet another batch of this goodness this past week and I ended up eating it with some chicken I made in the Instant Pot & some asparagus. Can we say high carb day in the best way possible!? I think so!

This recipe is Paleo, Whole 30, AIP, 21DSD & just about everything else friendly! Yippiee! Plus did I mention that it's great for your skin!?

 It's both simple & delicious and it'll go extremely well with just about anything! I'll be sharing an amazing autumn salad recipe soon that uses these bad boys and OMG it's really just delicious, I don't know what else to tell you! On Thanksgiving everyone was like "what is this magic, it's SO good!" people are always surprised when I tell them what it is because... Wait let me be annoying and say it again: it's SO good! I'm done being a tool for today.

Alrighty then - onward to the recipe!


Roasted Butternut Squash

Prep time: 5 minutes. Cook time: 40 minutes. Serves: 4

Ingredients:

2lbs Cubed Butternut Squash

2tbsp Coconut Oil, Bacon Fat, Tallow, or Lard

2 Sprigs of Fresh Rosemary

1tsp Granulated Garlic Powder

1tsp Himalayan Pink Salt

1tsp Dried Oregano

Instructions:

Preheat oven to 450 Degrees F.

Put all ingredients in a large mixing bowl. Coat the butternut squash evenly with coconut oil and seasonings. Spread cubed & seasoned butternut squash evenly onto two baking sheets so there is no overlap between cubes.

Bake for 20 minutes then remove from oven and move pieces around flipping and rotating positions so they will cook more evenly. Put the baking sheets back into the oven for a final 20 minutes. Remove from oven & cool slightly before you enjoy! 


YA'LL def add this to your new year meal prep rotation! Make a big ol batch and have some erryday for about 4 days. Store in the fridge (remember the going bad fast thing) and it tastes best when warm so heat em up before you eat! I wanna go make some more now! I'm obsessed!

Love you guys, have an amazing dayyyyy!


PS: READY FOR NATURALLY CLEAR SKIN & RENEWED CONFIDENCE?
Join hundreds of subscribers and get instant access to my resource library of ebooks, worksheets, and resources for acne sufferers & health seekers alike!

Pressure Cooker Chicken Soup

Mmmmmmmmmmmm you guys THIS SOUP IS DELISH.

Hubs and I have been a bit under the weather the past two weeks. Nothing crazy but annoying cold season congestion junk going on and it hasn't been too fun.

I mean obviously right?

Last week despite being sick I worked out everyday and really continued on as usual. But considering that I kept dealing with the lingering of this cold I decided to take a week off from exercise this week (which is sad I know) and just stay put as much as possible. Aaaaaand drink a bunch of tea. I am doing a tea detox after all so - TEA GALORE!

I feel like I've been a bit of a hermit because I have legit been sitting for around 20 hours a day working on ebooks and online guides nonstop, and watching a whole crap ton of TV in the background. Like seriously I watched A LOT and completed A LOT.

I started and finished multipleTV series on Netflix (holler if yo've seen any of these) including: The Fall, The Get Down (AMAZING SHOW), The 4400 (which was very weird), Chewing Gum (which was weird and quirky), Lovesick, movies like Burn After Reading, Hope Floats, Before We Go, and right now in the background I am "watching" Fuller House. Full disclosure, I keep pausing when I write or read things over because I honestly kind of like to write in silence or with just some music on. It's a concentration thing. Most of the work I've done this week hasn't been so much writing in full sentences but more so designing documents and pages, editing, revamping, working on new aspects of the website, and so on. I still had to leave the house a few times to teach but besides that I honestly haven't even washed the dishes this week. It's been great and really crazy productive with my business stuff at least!

But then everything changed......

*cue magical music*

Yesterday my darling husband went to Wegmans!!!!!! My excitement was at the "HE WENT TO JARED!" level no lie. I LOVE when he goes to my favorite grocery store to pick up things that I couldn't muster the energy to get myself. My hero! It was all his idea & we decided to make this delicious pressure cooker chicken soup aka Lemon Chicken soup together using our Instant Pot obviously! Yippieeee!

I have this thing where I really hate cutting up onions and garlic, and he cut up ALL the veggies for me and followed my instructions while I did the actual concocting! We don't cook together too often but I seriously love when we do. If you're looking for something fun to do with your honey buns sometime, try making a meal together!!! It makes the whole process a lot more fun!

Anyway, he bought all the ingredients I asked for and I had found a recipe for soup similar to this a few months back and we ended up going through a huge phase with my modified version of that soup. So I decided to make some more changes and adjustments and made it my own. I'm excited to share it now for all of you to enjoy as well!

It's delicious nutritious and I think you're just going to love it!

On that note I'll stop rambling and give you the recipe!! I used my Instant Pot but if you just have a regular pressure cooker that though work also! I do want to tell you also that there is rice in this recipe! You could try subbing the rice for cauliflower rice but I haven't tried this myself yet so I make no guarantees!!!

pressure cooker chicken soup.jpeg
pressure cooker chicken soup 2.jpeg

If you don't tolerate rice very well I have a few tricks to help you: 1. try soaking & draining it overnight before eating it. 2. cook it down til it's nice and mushy so it's super easy to digest. 3. get organic white rice since that's the easiest on your tummy. 4. make sure to rinse your rice with cold water until the water runs clear before you cook it.

Now for really here's the recipe for the pressure cooker chicken soup, with a LEMONY twist!


Pressure Cooker Chicken Soup

pressure cooker chicken soup 3.jpeg

Ingredients:

1.5lbs Organic Chicken Thighs, Whole 

1 Yellow Onion, Peeled & Chopped

1 Whole Garlic Clove, Peeled & Chopped

3 Carrots, Peeled & Chopped

2 Stalks of Celery, Peeled & Chopped

1 Leek

2tbsp Ghee

6 cups Water

1/2 cup Thawed Peas

1/2 cup Uncooked Rice

Juice of 4 Small Lemons or 2 Large

2tsp Sea Salt & extra Himalayan pink salt to taste

1/2tsp Oregano

1/2tsp Thyme

1/2tsp Rosemary

1/2tsp Basil

1/4tsp Cumin

1/4tsp Turmeric

Instructions:

Turn on the sautée function of your instant pot & melt the ghee. Add chopped garlic & onion to the instant pot until fragrant and translucent. Add chopped celery, and carrots to the pot and stir. Chop the white & light green portion of the leek stem and add to the pot. Reserve 2 of the dark green leaves to add later.

Sautee all veggies together for about 5 minutes or until veggies have softened a bit. Add thewater, raw chicken, uncooked rice, & 2 dark leaves from the leek.

Hit the 'Manual" function on your Instapot. Cook on high pressure for 1 hour 30 minutes. Use a utensil to move the valve and release all the pressure. Once the steam stops while the valve is still open, open the instapot, add the peas, lemon juice, & salt. With a ladle remove the dark green leek leaves & separate the chicken while it's still in the soup, it should fall apart and shred very easily. 

Stir everything together and let it sit for 10-15 minutes before eating! Be careful though, it's HOT! Also the longer the flavors sit and marinate the better it tastes!!!

Enjoy!!!


Guys guys did you notice that I actually took out my legit camera to take the pictures today instead of using my iphone?? I still have so much to learn about food photography in genral but especially with a REAL camera... I figured there's no time like the present to get started so here yah are!!!

Enjoy the soup & don't forget to tag me in your foodie pics!!


PS: READY FOR NATURALLY CLEAR SKIN & RENEWED CONFIDENCE?
Join hundreds of subscribers and get instant access to my resource library of ebooks, worksheets, and resources for acne sufferers & health seekers alike!

Easy Paleo Mayo (Whole 30 approved & fool proof!)

How is everyone doing with those Thanksgiving leftovers? Are you tired of turkey and stuffing yet?

My FAV thing to do with leftover turkey is to make turkey salad (used to be sandwiches back in the day) and have it with some leftover paleo rolls or wrapped in lettuce boats! I figured you should be able to enjoy this tradition also, so I'm sharing my Paleo Mayo recipe with you!!

This. Mayo. Is. The. Bomb. Dot. Com.

Seriously it is SO much better then that crap laden store bought junk in a jar. AND it's actually good for you!!! Oh happy day!!!!! I have always loved mayo and creating this recipe years ago was honestly a lifesaver for me when it came to making the paleo transition. You see, the more you can make your new paleo food resemble and taste like your old non-paleo favorites, the more quickly you forget that you've cut any food groups out in the first place!

Adding some mayo to make REAL tuna salad instead of just dry tuna and a burger with some mayo in my lettuce wrap instead of dry with only mustard makes a world of difference. It really does. And for this condiment lover (aka ME) it was a straight game changer.

Of course you can easily buy paleo mayo now too!

With all that being said.... I've got a doozie for yah! I live streamed myself making Paleo Mayo on my Facebook page like 8 months ago and it was a hit! I'm a huge fan of this recipe in general and I've been making it for years! It's seriously very quick and easy AND extremely hard to screw up. Which is good news in my book!

Did I mention that it's also crazy freaking delicious!? Well it is and I want you to experience it! Here's the video of my live streaming below:

Can you believe I actually started this post 8 MONTHS ago when I first made that live stream!? Holy wow I used to be inconsistent with typing up recipes and getting blog posts up... So much has changed since then. Thank goodness that's gotten better though huh!?

Alrightly then, here's the recipe in writing! 

NOTE: You will need an immersion blender & a wide mouthed glass jar in order to make this recipe easily! linked are the ones I use in this recipe.


Easy Homemade Paleo Mayo

5 minute prep time

Ingredients:

1 Free Range Egg (preferably organic)

1 Cup Avocado Oil (I do not recommend using ANY other oil in the recipe)

1 tbsp Fresh Squeezed Lemon Juice (about 1/2 of a lemon)

1 tsp Ground mustard

1/2 tsp Himalayan Pink Salt

1/2 tsp Garlic Powder

1/2 tsp Oregano

Instructions:

Crack egg into a wide mouthed glass mason jar. Pour in 1 cup of avocado oil. Next squeeze lemon juice directly into jar. Make sure the lemon juice sinks before you move onto the next step. 

Add seasonings to taste but make sure to add the salt & ground mustard or the taste will be a bit bland and off. I recommend using all the seasonings for a truly delicious mayo.

Put your  IMMERSION BLENDER into the jar flush against the bottom of the glass. Turn on the immersion blender and don't move it from the bottom of the jar for 10-20 seconds. After that you can move the blender around until everything is completely combined.

Store in the fridge for up to 7 days. (I have kept mine for longer, but just to be safe.)

Enjoy!


This mayo is not only easy but it's good on just about any and everything. I love to make tuna salad, chicken salad, egg salad, burgers, and so many other great dishes with this mayo! It's also very delicious as a dip with chips or cucumbers so keep that in mind!

It's a great source of healthy fats & protein too, so there don't need to be any guilt behind eating this creamy deliciousness! 

Make sure to share your pictures or videos of making this mayo and tag @thepaleoballerina so I can see them! ! It's a pretty magical process so I'd love to see your experience with it!

As always if you have questions then holler at me in the comments section right here on the blog! It's the easiest place for me to keep track AND your question might just answer someone elses question in the future! I know I always read through the comments before I make a new recipe! You just never know how your comment might help someone else!!

Happy mayo making everyone!


PS: READY FOR NATURALLY CLEAR SKIN & RENEWED CONFIDENCE?
Join hundreds of subscribers and get instant access to my resource library of ebooks, worksheets, and resources for acne sufferers & health seekers alike!

5 Ingredient Sweet Potato Casserole & Friendsgiving!

In a pinch and need a last minute sweet potato recipe for Thanksgiving!? Or are you just looking for some delicious Paleo carbs to add into your weekly meal prep rotation? Well either way you've come to the right place! This one is honestly the best sweet potato recipe ever AND it's super easy. Plus healthy. And it doesn't even have any added sugar, but no one will be able to tell! It's just that friggin good!

The good news is that foods with orange pigmentation like carrots, butternut squash, and you guessed it- sweet potato are loaded with beta carotene aka carotenoids aka vitamin A, that are great for optimum skin health! Yay for healing our skin with delicious food! Isn't that just the greatest!?

Seriously you NEED to make this recipe! I took it last night to celebrate Friendsgiving and it was gobbled up by everyone, paleo and non paleo eaters included. Everyone said they loved it, so if you don't like this recipe then you can just consider my friends liars.

But they're not. So you're gonna like it.

Bad news though: it got eaten so fast that I didn't even get a chance to snap a picture of the dish... SO YEAH. I'll take a new picture and add it to the post at some point but for now you guys just get a picture of sweet potatoes.

BOOM.

Also a picture we actually did get from last night of everyone:

Yayyyyy Friendsgiving!! Here's the crew from left to right: Me, Ernest(my hubs), Ryan, Anya, Aki, Kevin, Johanna, &amp; Alex!

Yayyyyy Friendsgiving!! Here's the crew from left to right: Me, Ernest(my hubs), Ryan, Anya, Aki, Kevin, Johanna, & Alex!

It was a really great night and I am honestly so lucky to have people in my life that I love and who I'm pretty sure love me back! But but, if it is in fact November in your world today and you're still looking for recipes, before Thanksgiving you're probably in a bit of a pinch so I won't go into all the details but just know that I love my friends and I love food and it was a great time! We even ate sushi! 

Now I'll cut to the chase and give you this delicious recipe!!


5 Ingredient Sweet Potato Casserole

Cook time: 1 hour 15 minutes. Serves 6-8 people. Double recipe for larger groups.

Ingredients:

4 large sweet potatoes
4 slices of bacon
Reserved Bacon Fat
1tsp Cinnamon + more for garnish
1/4 tsp Himalayan pink salt
2tsp maple syrup (optional)

Instructions:

Preheat oven to 450 degrees. Rinse sweet potatoes & pat dry. Wrap each sweet potato in tinfoil. Bake for 1 hour on a baking sheet. 

In the mean time pan fry the bacon. Remove bacon from pan & set aside on a plate. Do not wash or wipe down the pan! Just set the pan aside to use in the next step.

Once the sweet potatoes are done remove the skins and any dark hard spots with a fork or butter knife. They will be extremely soft and hot so be careful not to burn yourself! Place the skinless sweet potatoes into the pan with the bacon grease from earlier and turn the burner onto a medium high heat.

Roughly smash the sweet potatoes in the pan with a spatula so they're flat but not smooth. Season with cinnamon & salt and stir to combine. Let the potatoes sit for 30 seconds -1 minutes and stir on and off for about 8 minutes watching closely so they don't burn.

Transfer sweet potatoes to a glass baking dish and smooth the top with a wooden spatula or spoon.

On a separate plate cut up the bacon into small bite sized bits (you can do this with your hands) and evenly coat with maple syrup.

Evenly top the sweet potatoes with the candied bacon. **Bake uncovered for 5 minutes at 400 degrees.

After removing the dish from the oven you can further garnish the top with cinnamon but they taste great without it!

Serve and enjoy!!

**if you're traveling with this dish or making it in advance then skip this step until you're about to eat. Then bake for 10-15 minutes right before serving


You guys this recipe is so friggin good, I REALLY hope you make it and love it to pieces!!! If you do make it and especially if you love it then son't forget to tag me in your foodie pics! I love seeing all of your creations! You guys are the BEST!

Have an amazing Thanksgiving & day everyone!!!


PS: READY FOR NATURALLY CLEAR SKIN & RENEWED CONFIDENCE?
Join hundreds of subscribers and get instant access to my resource library of ebooks, worksheets, and resources for acne sufferers & health seekers alike!

Best Paleo Thanksgiving Recipe Roundup

This year will be my 4th totally paleo Thanksgiving! I have always loved Thanksgiving, but I honestly love the paleo versions of those staples even more than I loved the originals.

I will say though, it's NOT fun when you follow a new recipe on Thanksgiving and it ends up being a complete dud.

I mean that really sucks.

I do a ton of the cooking on the big day partially because I clearly have dietary restritions that I don't expect anyone to accomodate but it's also because I love having an amazing home cooked paleo meal. I don't often spend this much time in the kitchen making facy paleo dishes so it's really the one day/time of year that I can not only have delicious fancy paleo food for myself, but ALSO sharing with family and loved ones healthy AND delicious food!

Yes it's a lot of work and I do tend to get stressed, but I also think it's worth it every single year.

I also learn more and more every year. SOme recipes I've used every year while others are hit or miss. The good news is that I can share my experiences with you here now so if you decide to have some healthy paleo versions of traditional Thanksgiving food you can do so with confidence knowing that EVERYONE at the table will be able to enjoy it!

First and foremost, you have to prepare beforehand. Making everything on the day of is just not worth the stress, and might not even be physically possible. 

Here's my 2016 Paleo Thanksgiving Plan full with links to some of my FAV recipes!

Monday: Make sure plan is organized and ready to execute with cushion in case of unplanned events. Gather recipes and make master shopping list. Clean house & do any last decorating so you don't have to stress about it later. Wash dishes and clean kitchen so everything is ready to use in the coming days. If you're doing a brine for your turkey then start it today!

Tuesday: Buy all ingredients, thaw Turkey, chop veggies for stuffing & bake paleo bread for stuffing. Put Coconut cans in the fridge to separate.

Wednesday: Bake pies: I've made a ton of other pies in years past, but this year I'm keeping it simple and just making two. Pecan Pie & Pumpkin Pie. I'm trying a new recipe this year but I'll list a few below that I've used in the past! Prep veggies to go in turkey and take out turkey pan. Finish making Paleo Stuffing (it states better the next day IMO)

Thursday: GAME DAY! Wake up early to prep turkey & put it in the oven. Make the rest of your dishes and heat up foods you made the day before.


Main Meat Dishes

Turkey:

Nom Nom Paleo - last year was the first time I used this recipe, and I'm using it again this year because it was phenomenal! I didn't spatchcock the turkey, I just baked it like you would a normal turkey, but I followed the rest of these directions exactly. Stupid Easy Paleo - I have brined my turkey multiple times with multiple brines, but I prefer the first method I listed here much better! Plus it's honestly WAY easier! Primal Palate - If you do brine or otherwise marinate your turkey then you can use this method to cook it up!

Ham:

Glazed Ham: Paleo Leap - If you're into having other meats on Thanksgiving or just not having turkey then you could totally do this. Not really my thing at all since I like turkey. But you know... Options. 


Side Dishes

Stuffing:

Paleo Porn -I have made this for the past two years, and I'll be making it again for a third year. I didn't like the recipe I used the first year at all, I'm not even going to post it here. Waste of money and just tasted BLEH. Balanced Bites -I haven't made this one but a friend of mine has and she said everyone loved it... But again I have not tried this personally so it's hard to say.

Gravy:

This is similar to what I do, Jane's Healthy Kitchen however, I line my turkey roasting pan with onions on the bottom. I then blend those onions with the pan drippings and it's insanely delicious and SO easy! I also cut up and boil the giblets separately and add them in after blending.

Cranberry Sauce:

Balanced Bites - not the meatballs on this page, just scroll down to the cranberry sauce. This is very tart but you can up the maple syrup to make it sweeter, and personally I loved it! It's a great leftover also!

Green Bean Casserole:

Eat The Love - My sister in law makes the green bean casserole every year and this is the one she made this past year! The other one was from a book so the recipe isn't available online! But this one was good so I'd def try it out if you like green bean casserole without all the nasty stuff it typically includes!

Rolls:

Cassidy's Craveable Creations - My sister in law also makes the rolls every year and this is one of the recipes she's used! The Wheatless Kitchen - She also made some delicious herb sage rolls one year and I believe this was the recipe she used. I might have been a different one though! Since I might be wrong on the recipe front I'd recommend you use the first one I listed here to be safe.

Sweet Potatoes:

Martha Stewart - I've made a slightly different version of this and it was great! This recipe is really close to it so I'd imagine it's equally good. I would add some extra bacon fat or duck lard or butter or ghee to it beforehand but besides that I think it's a winner! Balanced Bites - I honestly wasn't a huge fan of this recipe, I'm not gonna lie. And to me using another appliance when the counter tops are already crowded is a bit of a hassle. This year I'm baking my sweet potatoes for 1hr at 450 then I'm going to pan fry them in coconut oil with some cinnamon. Then I plan to throw them into a baking dish and bake them with a tad bit of cinnamon and maple sugar on top at 350. Very easy and simple. (I'll hopefully post the full recipe tomorrow)

Mashed Potatoes & Cauliflower:

The Paleo Ballerina - Yep I use my own recipe for mashed cauliflower here and it's awesome. Plus it's super easy so I would def make this!!

Paleo Plan - If you prefer regular mashed potatoes then use this recipe! You can always make both and see which one people like better! You might be surprised by the result! 

Butternut Squash:

Beachbody Recipe Blog - this is similar to my own recipe for butternut squash (which also hasn't hit the blog yet) but the only changes I'd make is it use bacon fat or coconut oil, and also to add granulated garlic, oregano, and even some dried parsley or basil! This is crazy delicious when made just right!

Mac and "Cheese" (not fully paleo)

The reason I say this isn't fully paleo is because I use brown rice pasta!! I'm obsessed with THIS BRAND!! Vegan Yumminess - I made this last year and it was good! I'm def skipping it this year because I want everything as simple as possible and I don't know how 'necessary' it was... But I know some of you love to have some mac n cheese with your Thanksgiving meal, and I don't blame you! Minimalist Baker - I haven't made this one but it looks pretty good also.... Different version of the one posted before this, but different! Except I wouldn't do the 'vegan parmesan cheese' personally. 


Desserts

Pumpkin Pie:

Primal Palate this is the new recipe I'm trying this year. Against All Grain my first Paleo Thanksgiving I made this one and it was great, I just want better HAHA. The Paleo Mom I made this one the next year in search of a better recipe and was a bit underwhelmed since it's titled "the best"... Thrive Market Blog - my third attempt to find the best - and this one was my favorite so far! Yeyyy!!! But I'm a total pumpkin pie snob and it's my favorite which is why this year I'm planning to try a new recipe. If it's not perfect then I'll be reverting to this recipe!

Apple Pie:

Zen Belly -I'm not gonna lie, this was REALLY labor intensive. But it was yummy. The time consuming labor intensive part is why personally I'm skipping it this year...

Pecan Pie:

Elana's Pantry -crowd favorite every single year! It's DELISH and really super duper easy to make! They won't even know it's Paleo.

Coconut Cream Pie:

Living Healthy With Chocolate - I don't typically make this for Thanksgiving BUT it is crazy delicious and a huge crowd pleaser! If you want to mix it up in the pie department, this would be a great addition to any spread!

Toppings:

Dairy Free Whipped Cream -up the honey content or swap out the honey for maple syrup for a slightly different flavor. Taste it as you go. This recipe isn't very sweet so I do recommend upping either the honey or maple syrup until you can tolerate the sweetness or lack thereof. Vanilla Ice Cream -I haven't made this exact recipe before but I've made my own that's similar to this and it was great!


I may add some more recipes as I think of them before Thursday, but I think that's pretty much it!!! We absolutely love Thanksgiving and these recipes. I hope they serve you and your family well!!! I'm so Thankful for each and every one of you!!!

I would LOVE to see your creations so don't forget to tag me in your IG & FB posts. But more importantly, if you found this post helpful then make sure to share it so that everyone can enjoy both healthy and delicious food this Thanksgiving!!


PS: READY FOR NATURALLY CLEAR SKIN & RENEWED CONFIDENCE?
Join hundreds of subscribers and get instant access to my resource library of ebooks, worksheets, and resources for acne sufferers & health seekers alike!

Paleo Staples - Rosemary Garlic Mashed Cauliflower

Paleo Staples - Rosemary Garlic Mashed Cauliflower

These creamy, fluffy mashed cauliflower florets are the perfect side dish to just about any meal! Add in some olive oil and grass fed butter & you've got a match made in heaven!

PS: READY FOR NATURALLY CLEAR SKIN & RENEWED CONFIDENCE?
Join hundreds of subscribers and get instant access to my resource library of ebooks, worksheets, and resources for acne sufferers & health seekers alike!

Paleo Staples - Baked Bacon

Hidy Ho There Neighbor!

Why did anyone think that saying was a good idea? Admittedly I DID love Mr. Rogers Neighborhood in all his cardigan glory. I wonder how that show would do with kids now... Probably not so well since it was REALLY slow paced!

I'm sorry I went way off track there!

Baked bacon! I have taught a BUNCH of people this trick and it's really just the best. But only does it eliminate the reason a lot of people don't like cooking bacon (aka the spitting oil) but I actually think bacon tastes better when it's been baked! Plus once you remove the bacon from the pan after cooking you can actually bake some good ol veggies right in those beautiful leftover fats. I mean convenient AND delicious? That's the way to go!

I do want to make a few notes about BACON in general.

The fats in bacon and the fats that cook off of bacon are NOT bad fats. They're actually fats that are very stable at high heats and therefore a great alternative to other oils we tend to cook with that are better when served cold like Olive Oil. I absolutely LOVE Olive Oil BUT I don't cook with it, and I'm very stingy about the type of Olive Oil I'll purchase. In fact there's literally only one brand that I'll eat: Kasandrinos! But more on that in another post. Back to the bacon talk.

Another thing when it comes to bacon is the quality. Since bacon is a fairly fatty cut of meat, and conventionally raised animals store toxins in their fat cells, you want to make sure you're getting good quality bacon and there are some things to look for. PLUS you're probably going to using the fats that cook off of the bacon for cooking other dishes. SO it's worth buying better quality.

Always read the ingredients! Some "uncured" bacon still has super gross ingredients. I've been a victim to this in the past. Bought some uncured turkey bacon, then got home and read the ingredients. I'll just say BARFFFFF! Don't waste your money like I did that one time! Anything you can't pronounce or find in your own kitchen should be a red flag.

Do make sure it's uncured - as in no Sodium Nitrate, Sodium Phosphates, or Sodium Erythorbate, but instead it should be 'cured' with natural ingredients like celery powder, salt, & sometimes beet juice. Again you should recognized the ingredients used.

There will probably be sugar in the ingredients, don't freak out! Sugar in this case is typically fine and just used for curing the meat. The way you'll know if it's ADDED sugar or curing sugar is by looking at the sugar content in the nutritional facts AFTER you've read through the ingredients list and deemed it safe. There should be 0-2 grams of sugar maximum. 0g is ideal, but 1-2g won't kill yah by any means! Especially if everything else about the bacon looks good!

 Look for clues on how the animal was raised! Words like cage free (for turkey bacon), or free range, or organic, or humanely raise, or humanely slaughtered, are all good words to see. Word like "natural" and "no growth hormones" are just buzz words and essentially mean nothing, so don't be fooled!

The quality of your bacon is also going to affect the TASTE big time! I actually HATED bacon until I tried some good quality uncured bacon, and I have never looked back. Now I'm bacon obsessed, but I really still only like the taste of uncured bacon!

On that note, here are some great online resources for good quality bacon without all the research:

US Wellness Meats

Pete's Paleo

Applegate Farms (can be found in many grocery stores)

Now onto this uber duber simple recipe!


Baked Bacon

Makes 1 package or 6 Slices of Bacon

Ingredients:

1 package of uncured bacon.

Foil (optional)

Instructions:

Preheat oven to 350 F. While oven is preheating, line a rimmed cookie sheet with foil for easy clean up. If you don't have foil, then simply place the slices of bacon directly on your baking sheet. Fit as many slices of bacon as you can on the baking sheet, but do not overlap slices. Depending on thickness of your bacon and your desired crispiness, bake the bacon anywhere from 18-40 minutes. A large pan with very thick bacon can take 40 minutes. However, most batches take about 20-25 minutes. Just keep an eye on the bacon towards the end until it reaches your desired crispiness. Serve warm and store leftovers in the fridge! 


Phew, that was a super complicated one so I hope you can do it! (please note sarcasm)

As always I appreciate you and your support! Please continue to engage & share your creations with me by tagging me in your cooking pics! I love to see my recipes coming to life in your kitchens! PLUS it helps more people find my blog and use the tools I provide for you here!

You know the drill for questions, comments, or whatever - drop em below in the comments section and don't forget to click that share button! <3

Have an amazing Tuesday everyone!


PS: READY FOR NATURALLY CLEAR SKIN & RENEWED CONFIDENCE?
Join hundreds of subscribers and get instant access to my resource library of ebooks, worksheets, and resources for acne sufferers & health seekers alike!